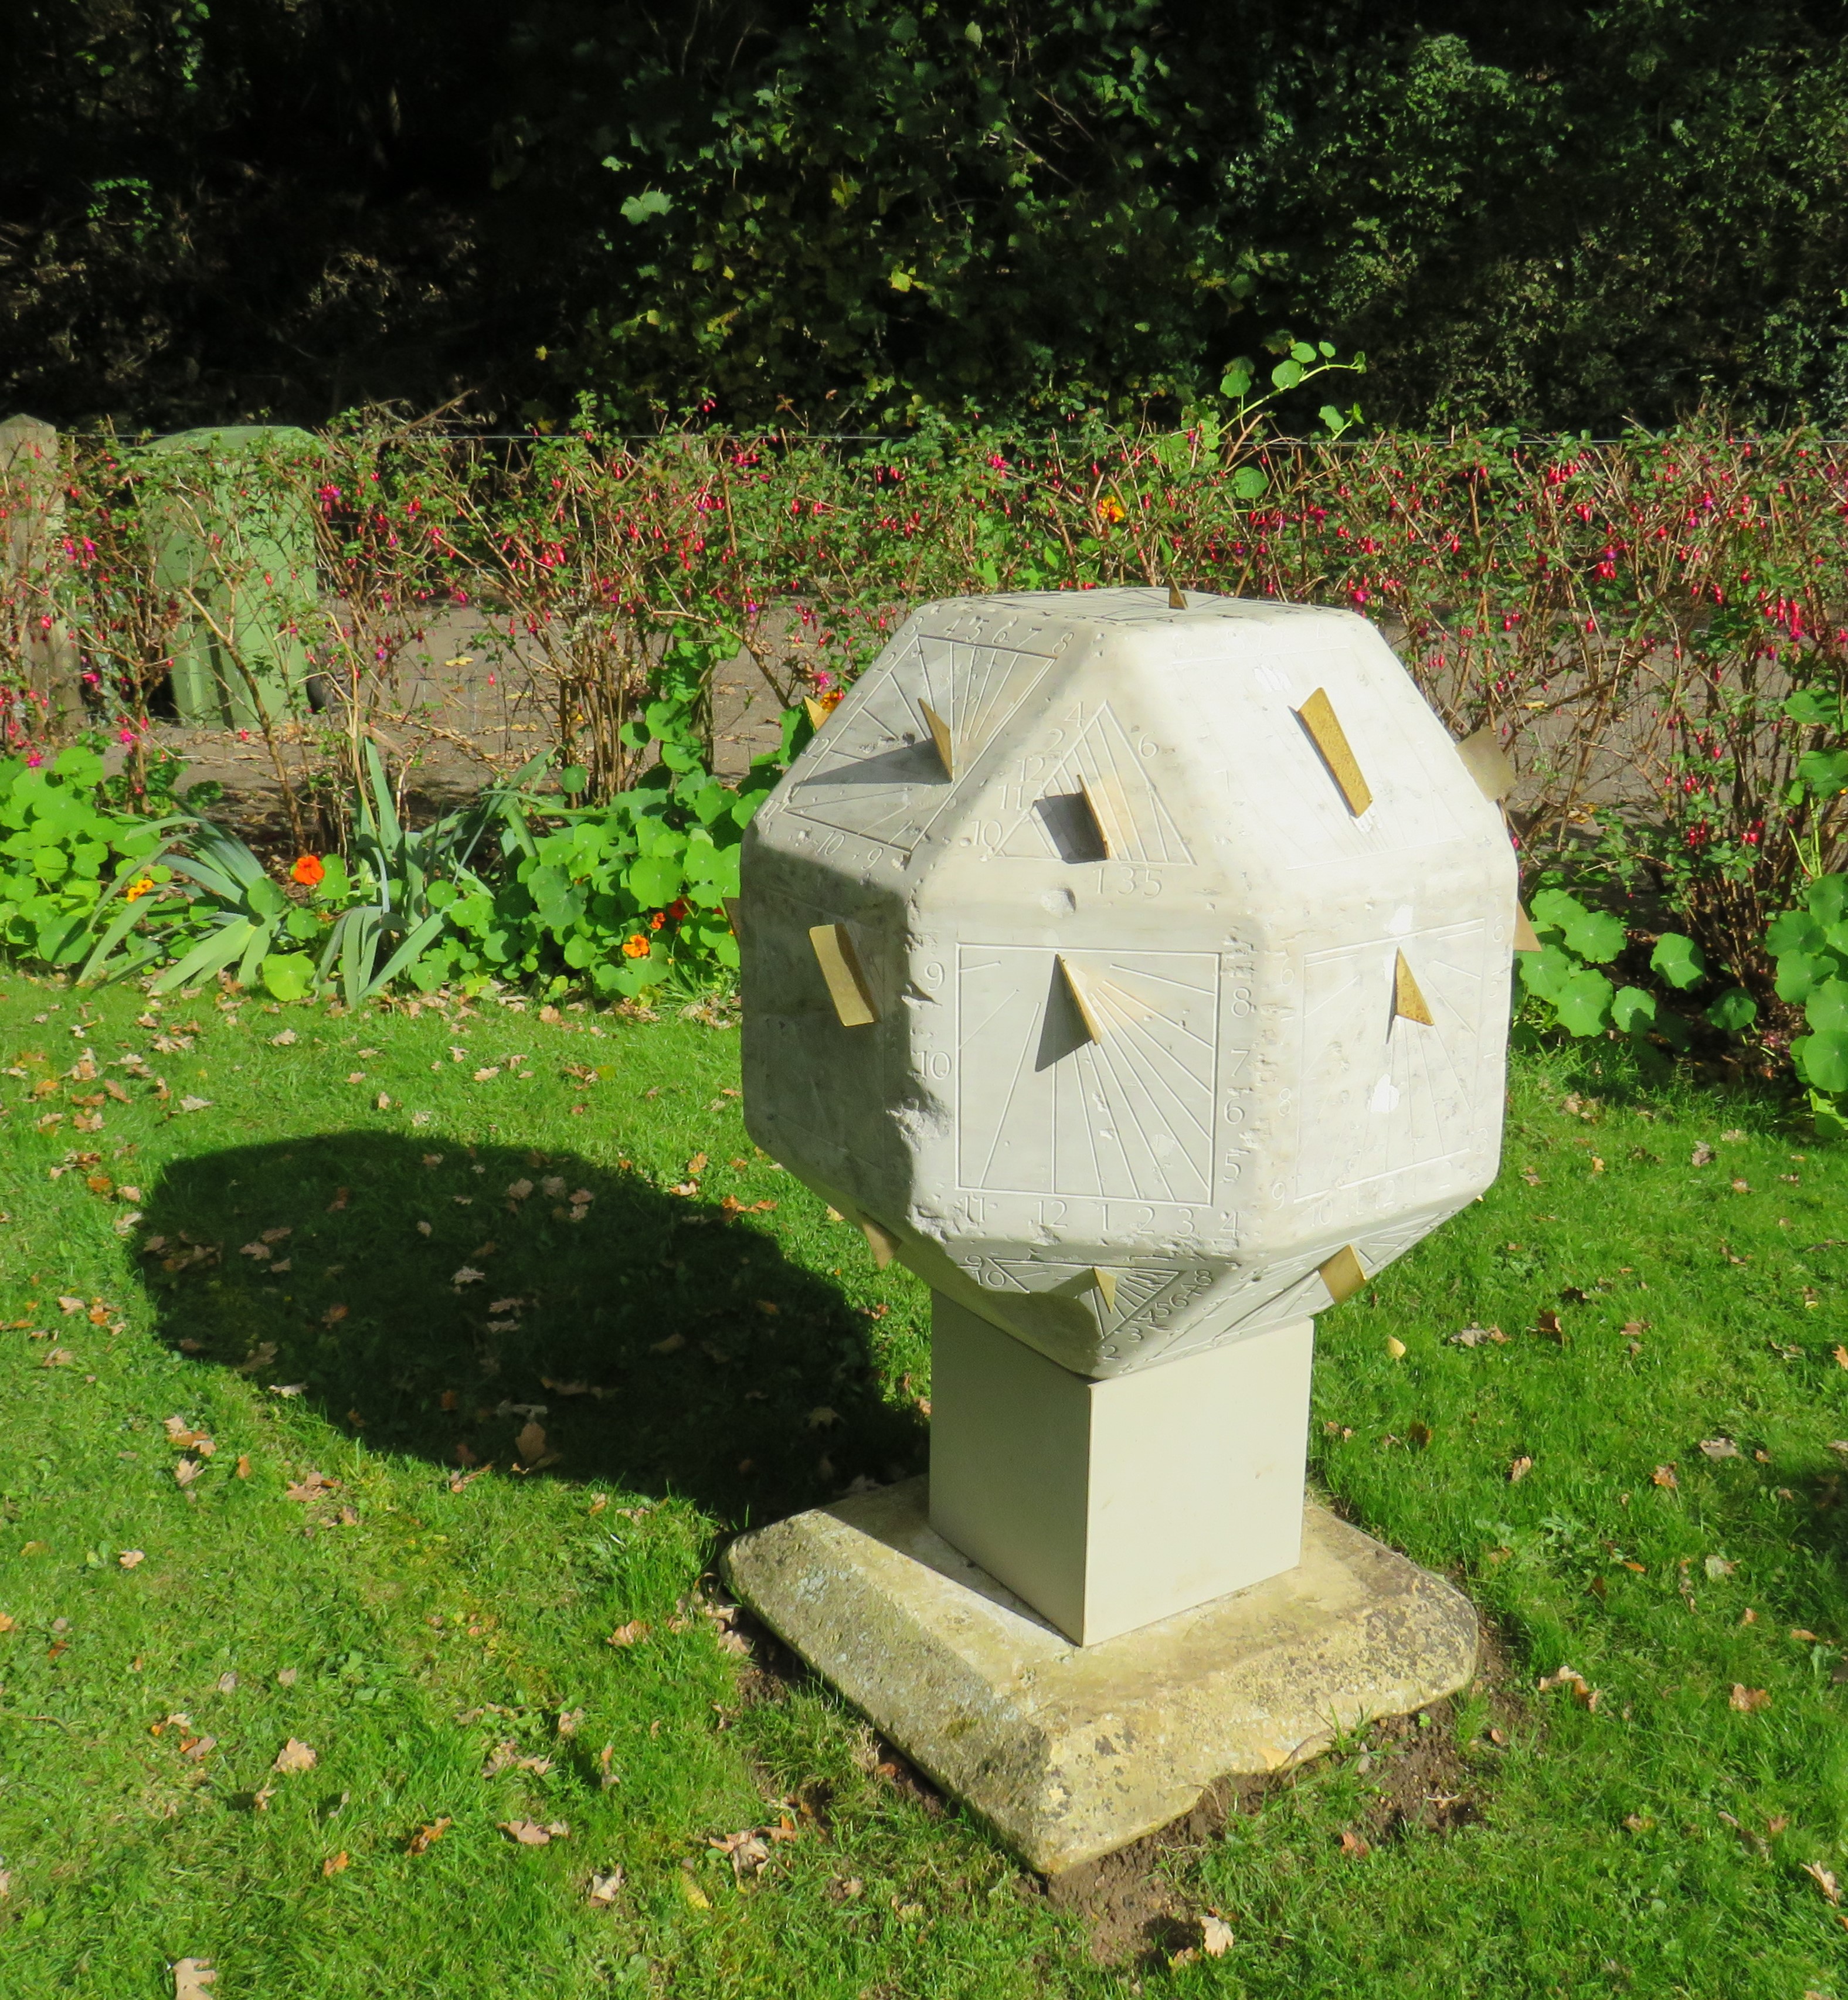
The BSS Help and Advice desk, efficiently managed by Sue Manston, receives and replies to almost one hundred enquiries per year. Occasionally, when specialist knowledge or skills are needed, the requests are passed on to other BSS members. In May 2019 our Chairman, Frank King, was made aware of a request for someone to restore a rather sad-looking polyhedral sundial that had lost all its gnomons and delineations. He, in turn, asked whether I would attempt it, and sent me the contact details and a photo, together with some helpful and astute general notes and references to other sundials of the same genre. Little did I suspect at the time what a challenge this would turn out to be, but retrospectively what a great recreation it was to have had during the first pandemic lockdown of 2020. The re-creation of the sundial turned out to be a physical challenge but also a highly satisfying project.
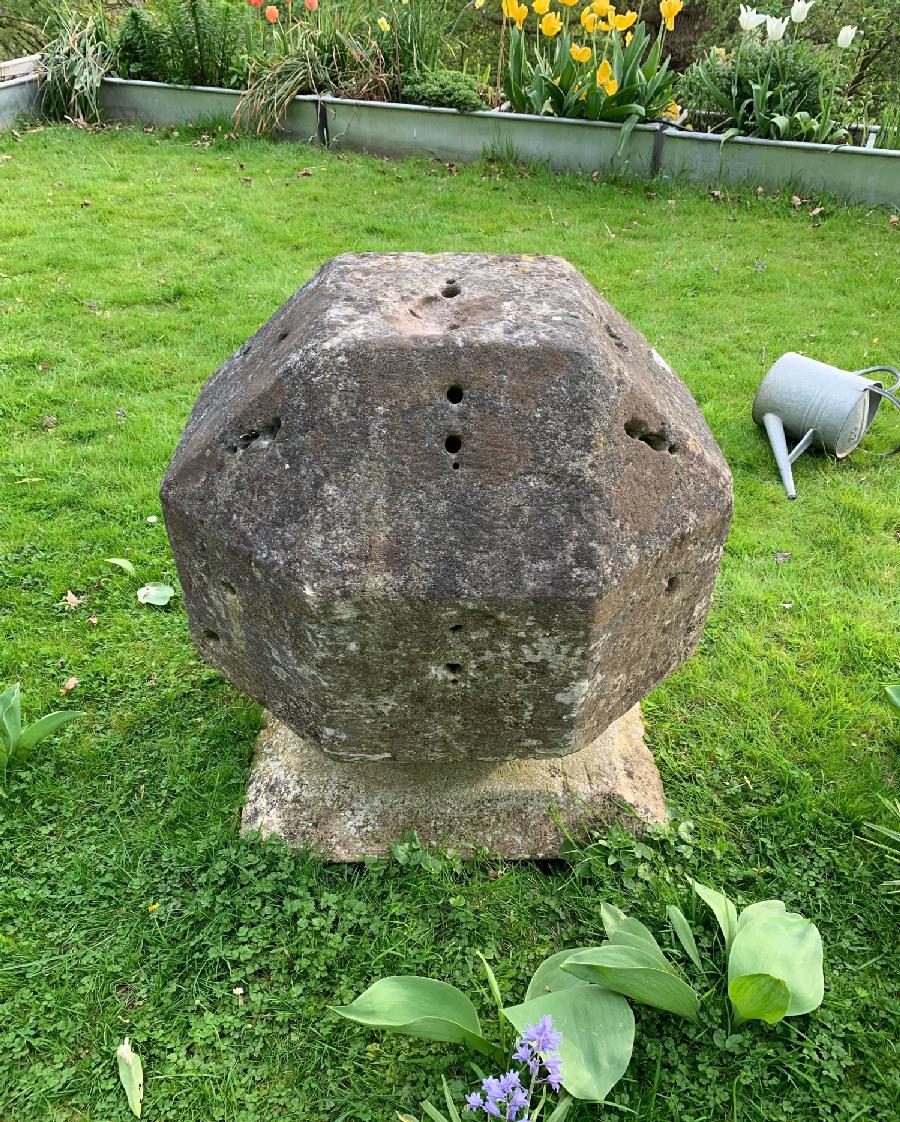
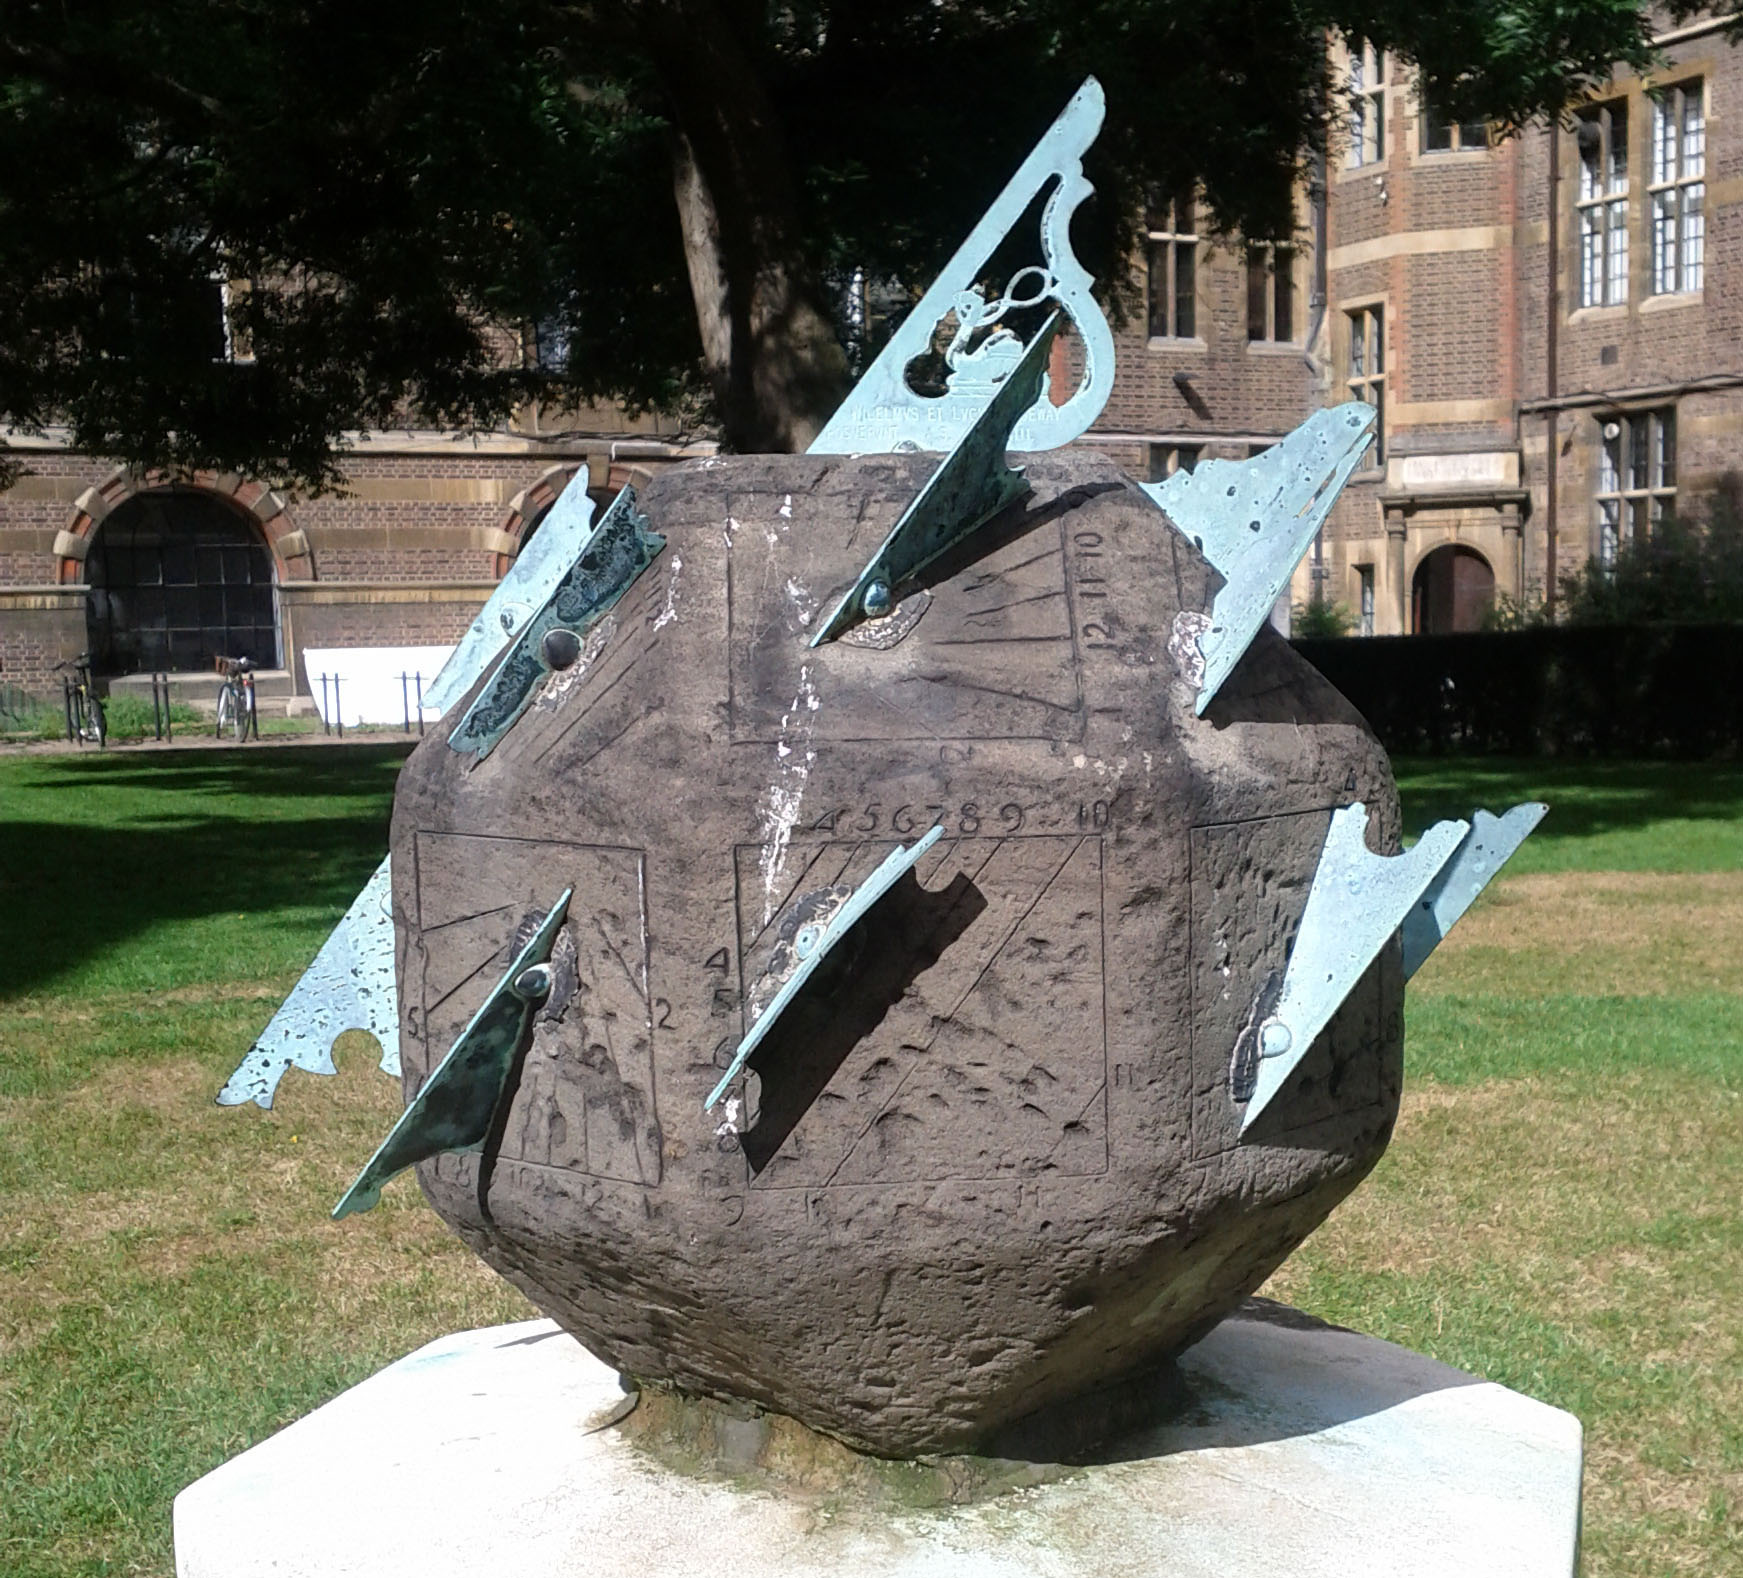
The photo that Frank sent (Fig. 1), taken by the owner, Ted Stevens, near Gloucester, showed the polyhedron to be a rhombicuboctahedron. It has 26 faces, of which the 25 exposed faces had holes that would have been for gnomons. Frank referred to a similar iFrank pointed out that whereas the Downing dial is an ‘elongated square gyrobicupola’, Ted’s dial is simply an ‘elongated square bicupola’. The slight difference between the two can be seen by following the square faces down from the top. On the Downing dial, the lowest visible face is a triangle whereas on Teds dial, the lowest visible face is a square., but smaller, sundial in Cambridge at the Downing Site (Fig. 2).
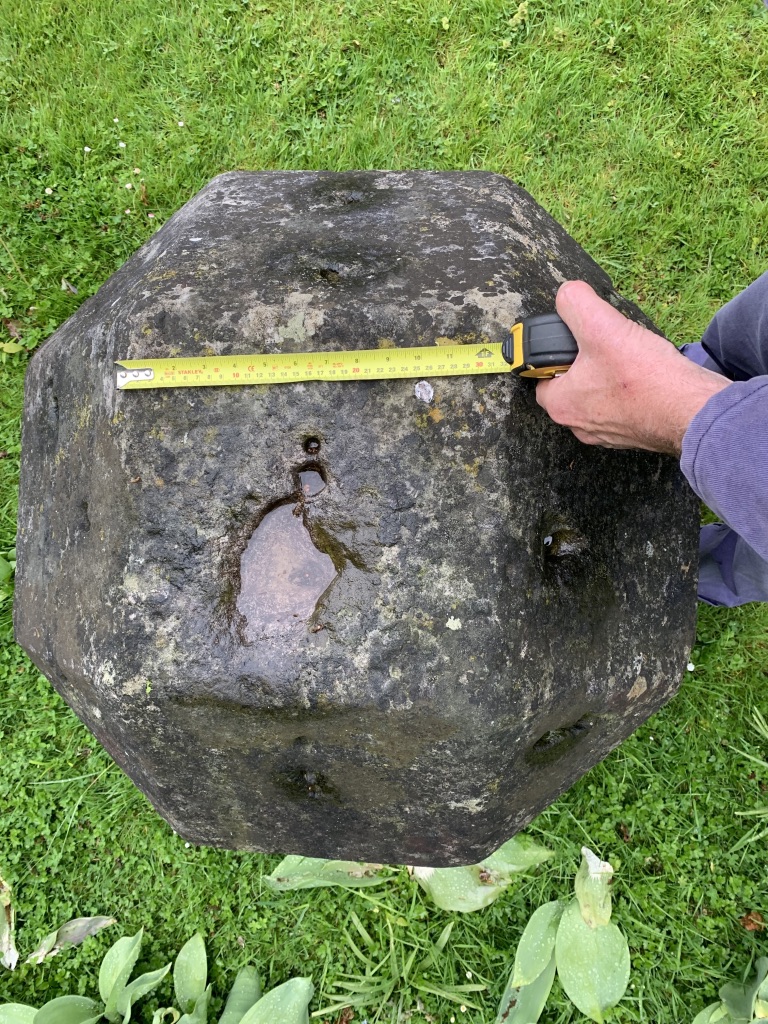
I had made polyhedral sundials of this shape before but had not worked on one as large as this. Its size, weight, closeness to the ground, distance from home, and the likely time needed to bring it back to life meant that working on it in situ was not an option. I arranged a visit to Gloucester, and Ted told me that he remembered that some sixty years ago, as a child, he used to climb on the sundial. It had no gnomons even then. The detailed history of the dial is remembered only sketchily by himself and his relatives: he knew that his grandfather had worked as head gardener at a large property in the Solihull area of Warwickshire. The dial may have originated there, or possibly he had acquired it separately in that area or in Cornwall to which he had retired. The stone appeared to be extensively darkened with grime and algae as well as pitted by erosion and physical damage. There were larger areas of damage to lower faces. Deep and wide gnomon holes in every face were homes to insects, and the uppermost horizontal face in particular had suffered from freeze-thaw erosion from water that collected in the gnomon holes (Fig. 3).
We agreed that the dial would have to be moved to my home in Somerset since the work on it would take some time. A notional completion target of Summer 2020 was thought to be realistic. I suggested that before committing to the restoration, I should make a scale model of the dial, together with an additional supporting plinth (Fig. 4).
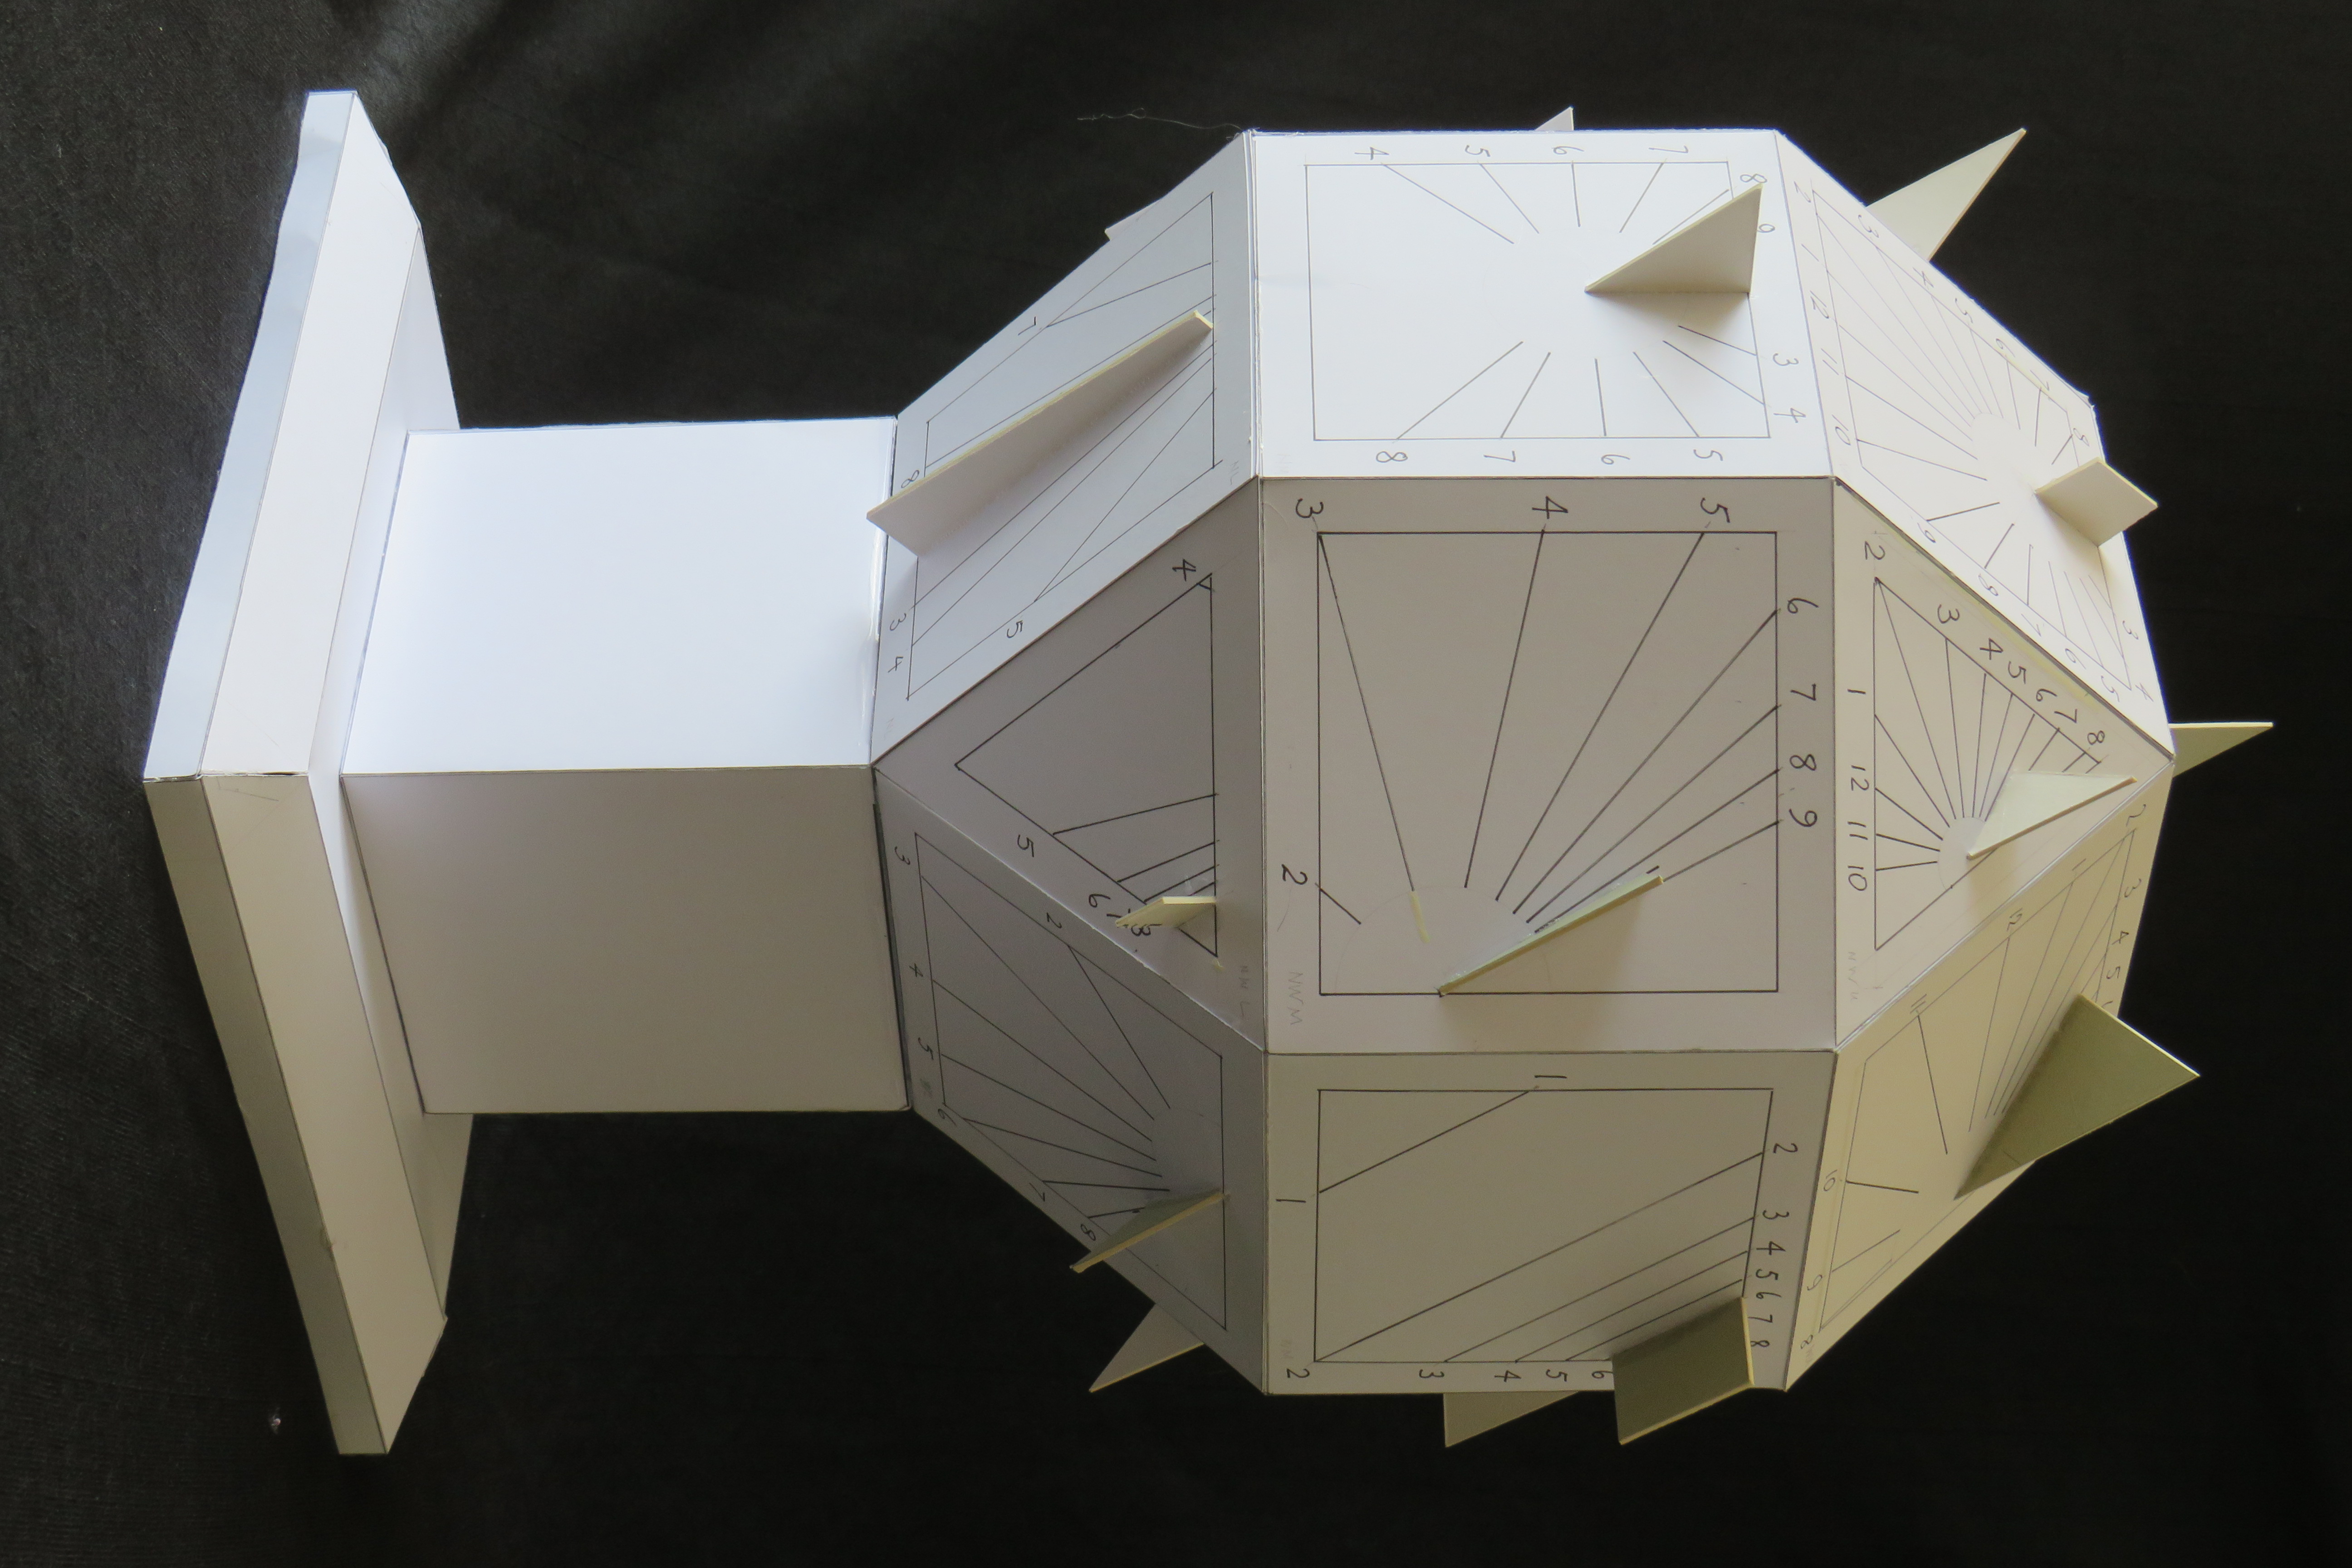
I made use of photographs I had taken of all the faces so that new gnomon positions could match the old ones wherever possible. For his part, Ted would clean the surfaces as well as he could with a high-pressure water jet. On a further visit to Ted in August 2019, Ted was pleased to see the model as beginning to bring his stone back to life. Some decisions would be deferred, such as whether to include commemorative date curves for family members, and whether paint should be applied to the new incisions.
The edges of the dial were found to be close to 30cm, so from the pre-decimalisation age of the dial it seems to have been made with edges of 1 ft. The exact type of stone was uncertain at this time, but it was quite soft, so granite was ruled out, thankfully. Arrangements for the physical removal of the dial were left to Ted. I estimated its weight to be about 650kg, and Ted was able to find a local firm iM. B. Holder & Sons Ltd., Gloucester. who could undertake the transport. The site would be a challenging one for a pick-up truck with a crane, being on a hillside with access from a narrow tree-lined single-track lane, but these difficulties were managed and the stone arrived at my home in October 2019. A gantry was brought into use to transfer the stone from the delivery truck to my yard (Fig. 5).
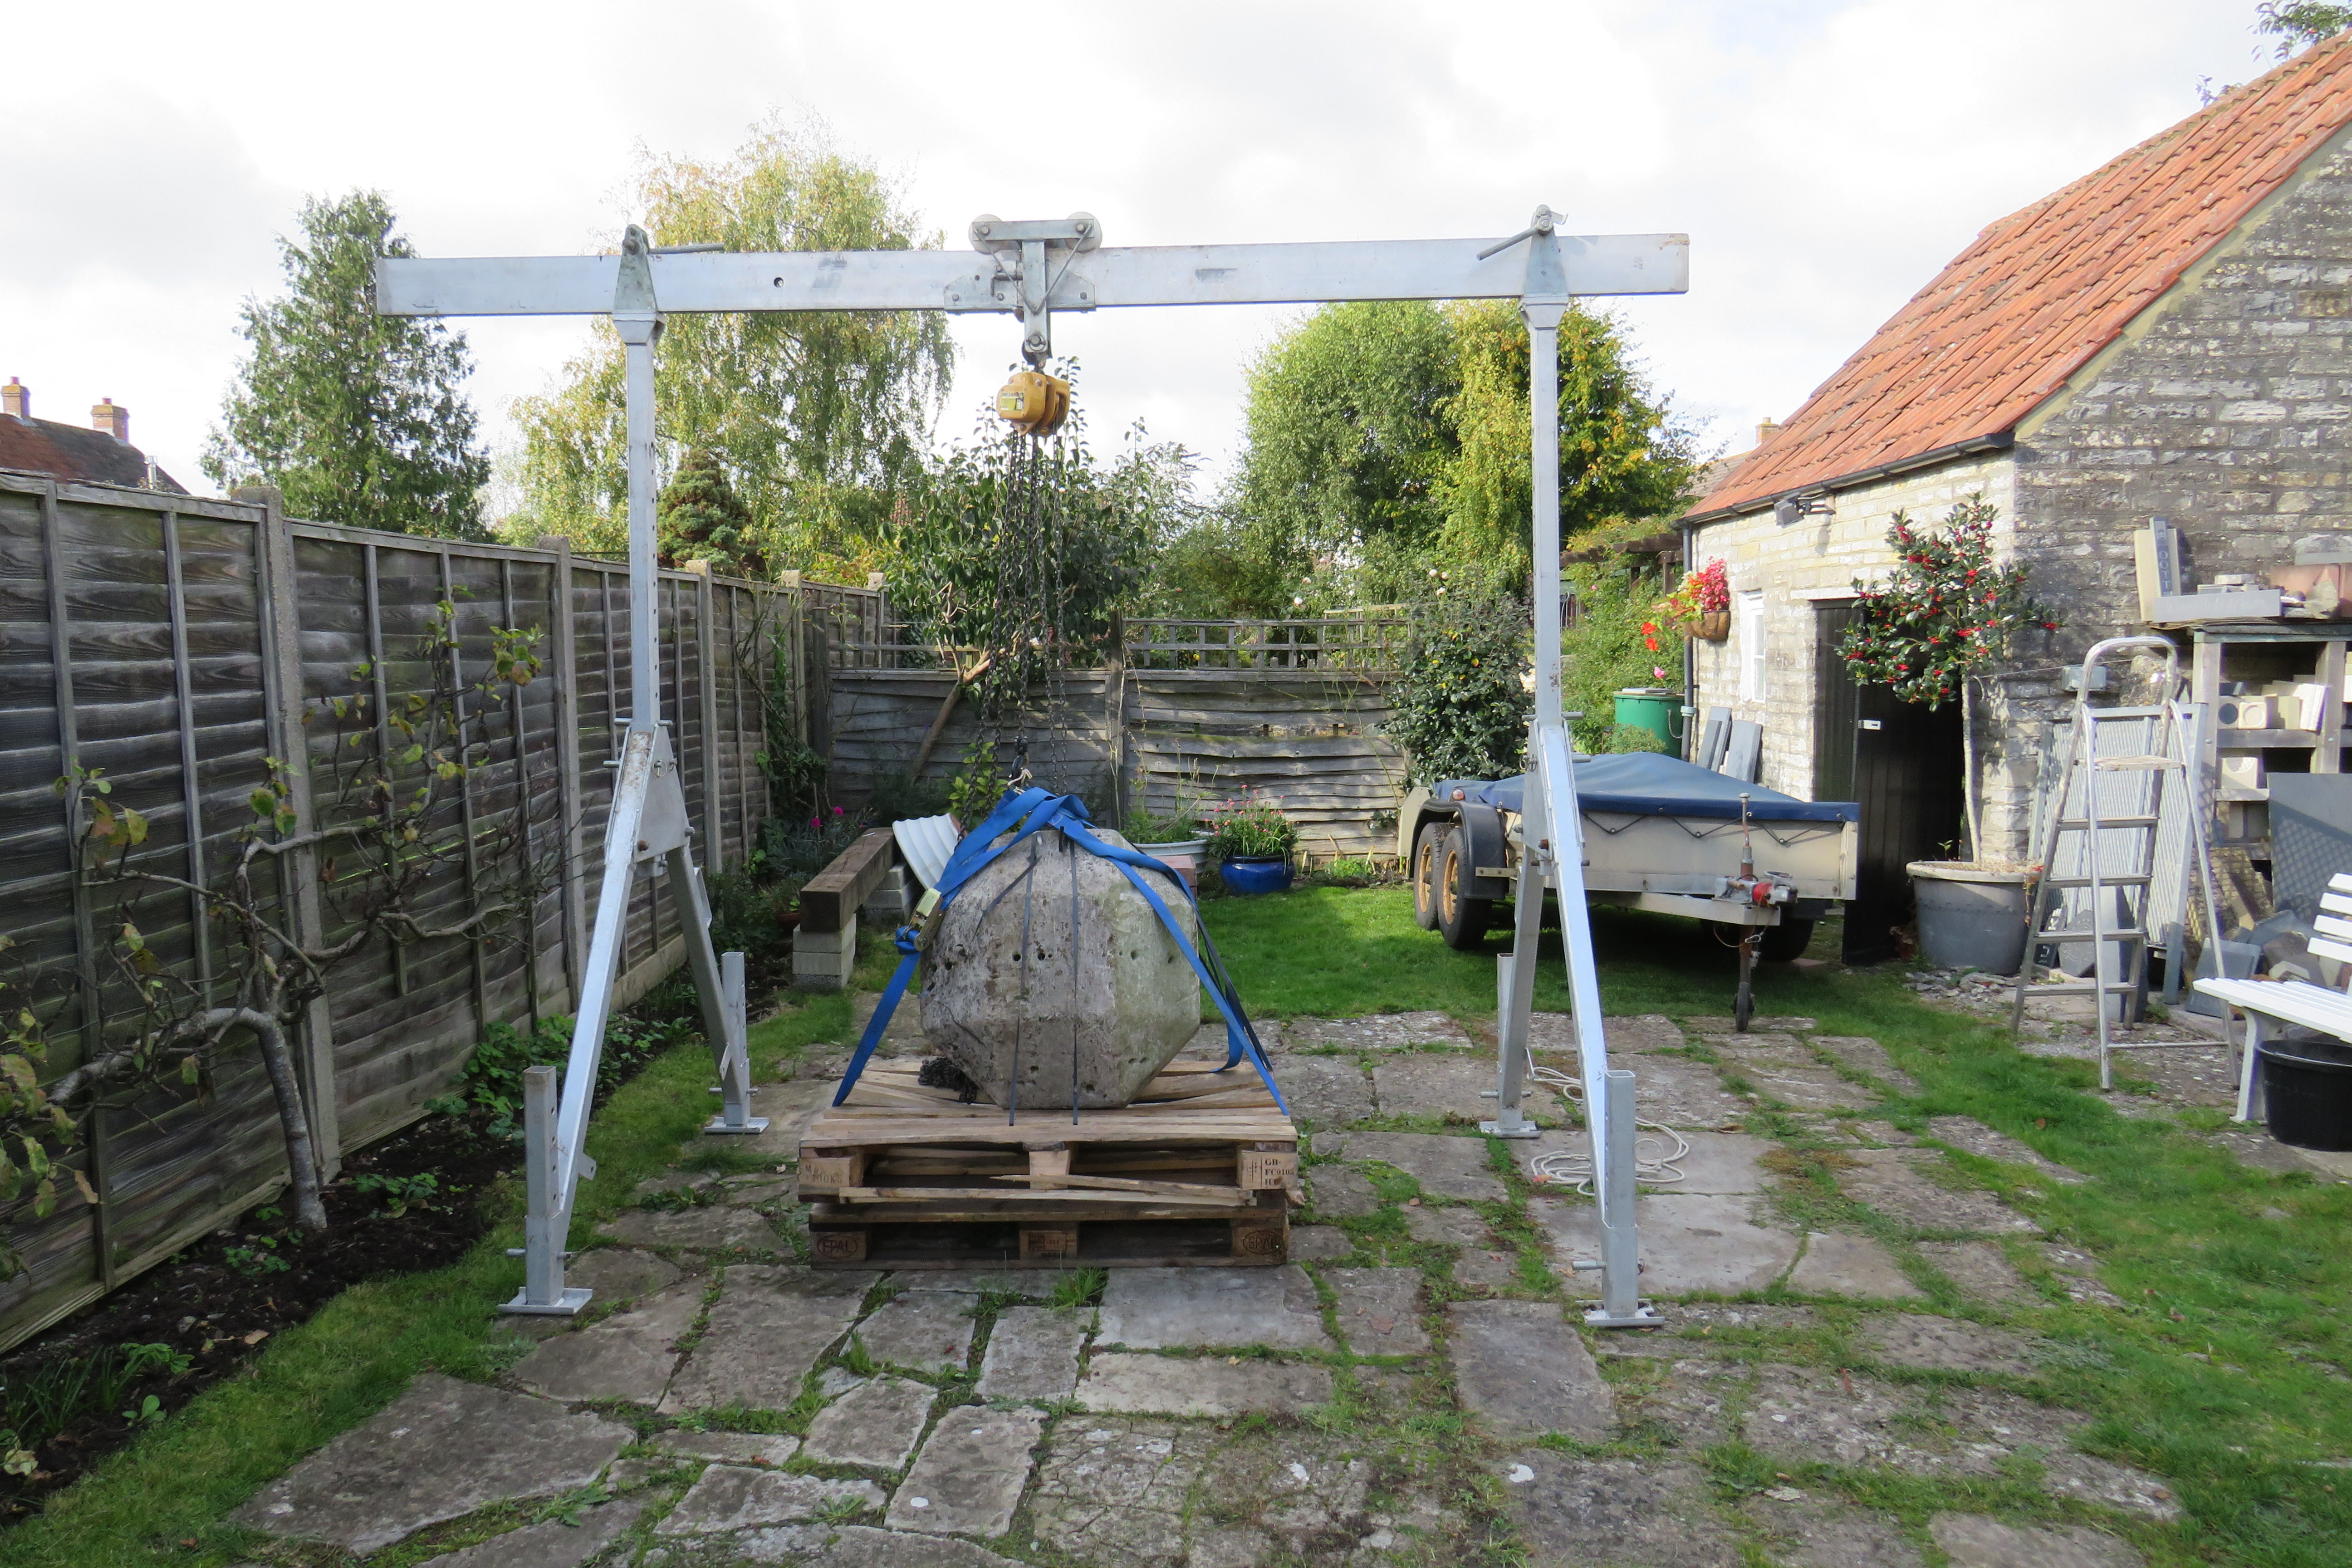
The stone was too large to go into my workshop, so all the work on it had to be done in the open air. Consequently, progress was dictated to a large extent by weather conditions, and with winter approaching, no incision work was carried out until Spring 2020. Nevertheless, using a dilute hydrochloric acid test, I did establish that the stone was not a limestone since there was no effervescence apparent when a small drop of dilute hydrochloric acid was placed on a clean area of the stone. It was, in fact, a very soft very fine-grained light-coloured sandstone. This was further confirmed much later when I found that the sharp edges of my tungsten-carbide-tipped lettering chisels lost their edge much more quickly than I would have expected if it had been a limestone. Similarly, diamond abrasive pads wore out very quickly when used for rubbing the surfaces. With no original features to be preserved, I felt that abrasive cleaning of the surfaces would be acceptable, and I used a water-fed angle-grinder with diamond pads to do this. Arises, which presumably had been sharp-edged initially, had suffered over the years showing many indentations, and it would have needed far too much stone-removal to re-form them, so the arises were smoothed and rounded. It would have been too destructive to try and remove all the indentations in the surfaces and edges and doing so would have also removed some of the character and history of the dial. Former gnomon holes were also cleaned out to remove as much as possible of the accretions. Algae and grime residues in the deeper surface indentations were also extensively cleaned. A proprietory stone cleaner solution iDelphis Eco masonry and stone cleaner. was also applied and the whole surface washed down later with water. The stone was covered for most of the winter months, and exposed in dry weather, and over time it dried out to leave a very light-coloured smooth surface.
Looking ahead to a later stage of the re-creation, I spent some of the winter months trying to track down a possible quarry of origin of the stone. The only way I could do this was to use addresses of sandstone quarries as given in the Natural Stone Directory iQMJ Publishing Ltd., 7 Regent Street, Nottingham, NG1 5BS. I collected about a dozen samples which likely quarries kindly sent to me and eventually decided that the closest match in colour and texture that I could get was ‘Dunhouse grey’ from Dunhouse Quarry near Darlington in County Durham iDDunhouse Quarry Works, Cleatham, Darlington, Co. Durham, DL2 3QE. I ordered a 30 cm cube for the plinth and a 23 cm square piece, 2 cm thick for inserting in the much-damaged uppermost horizontal face.
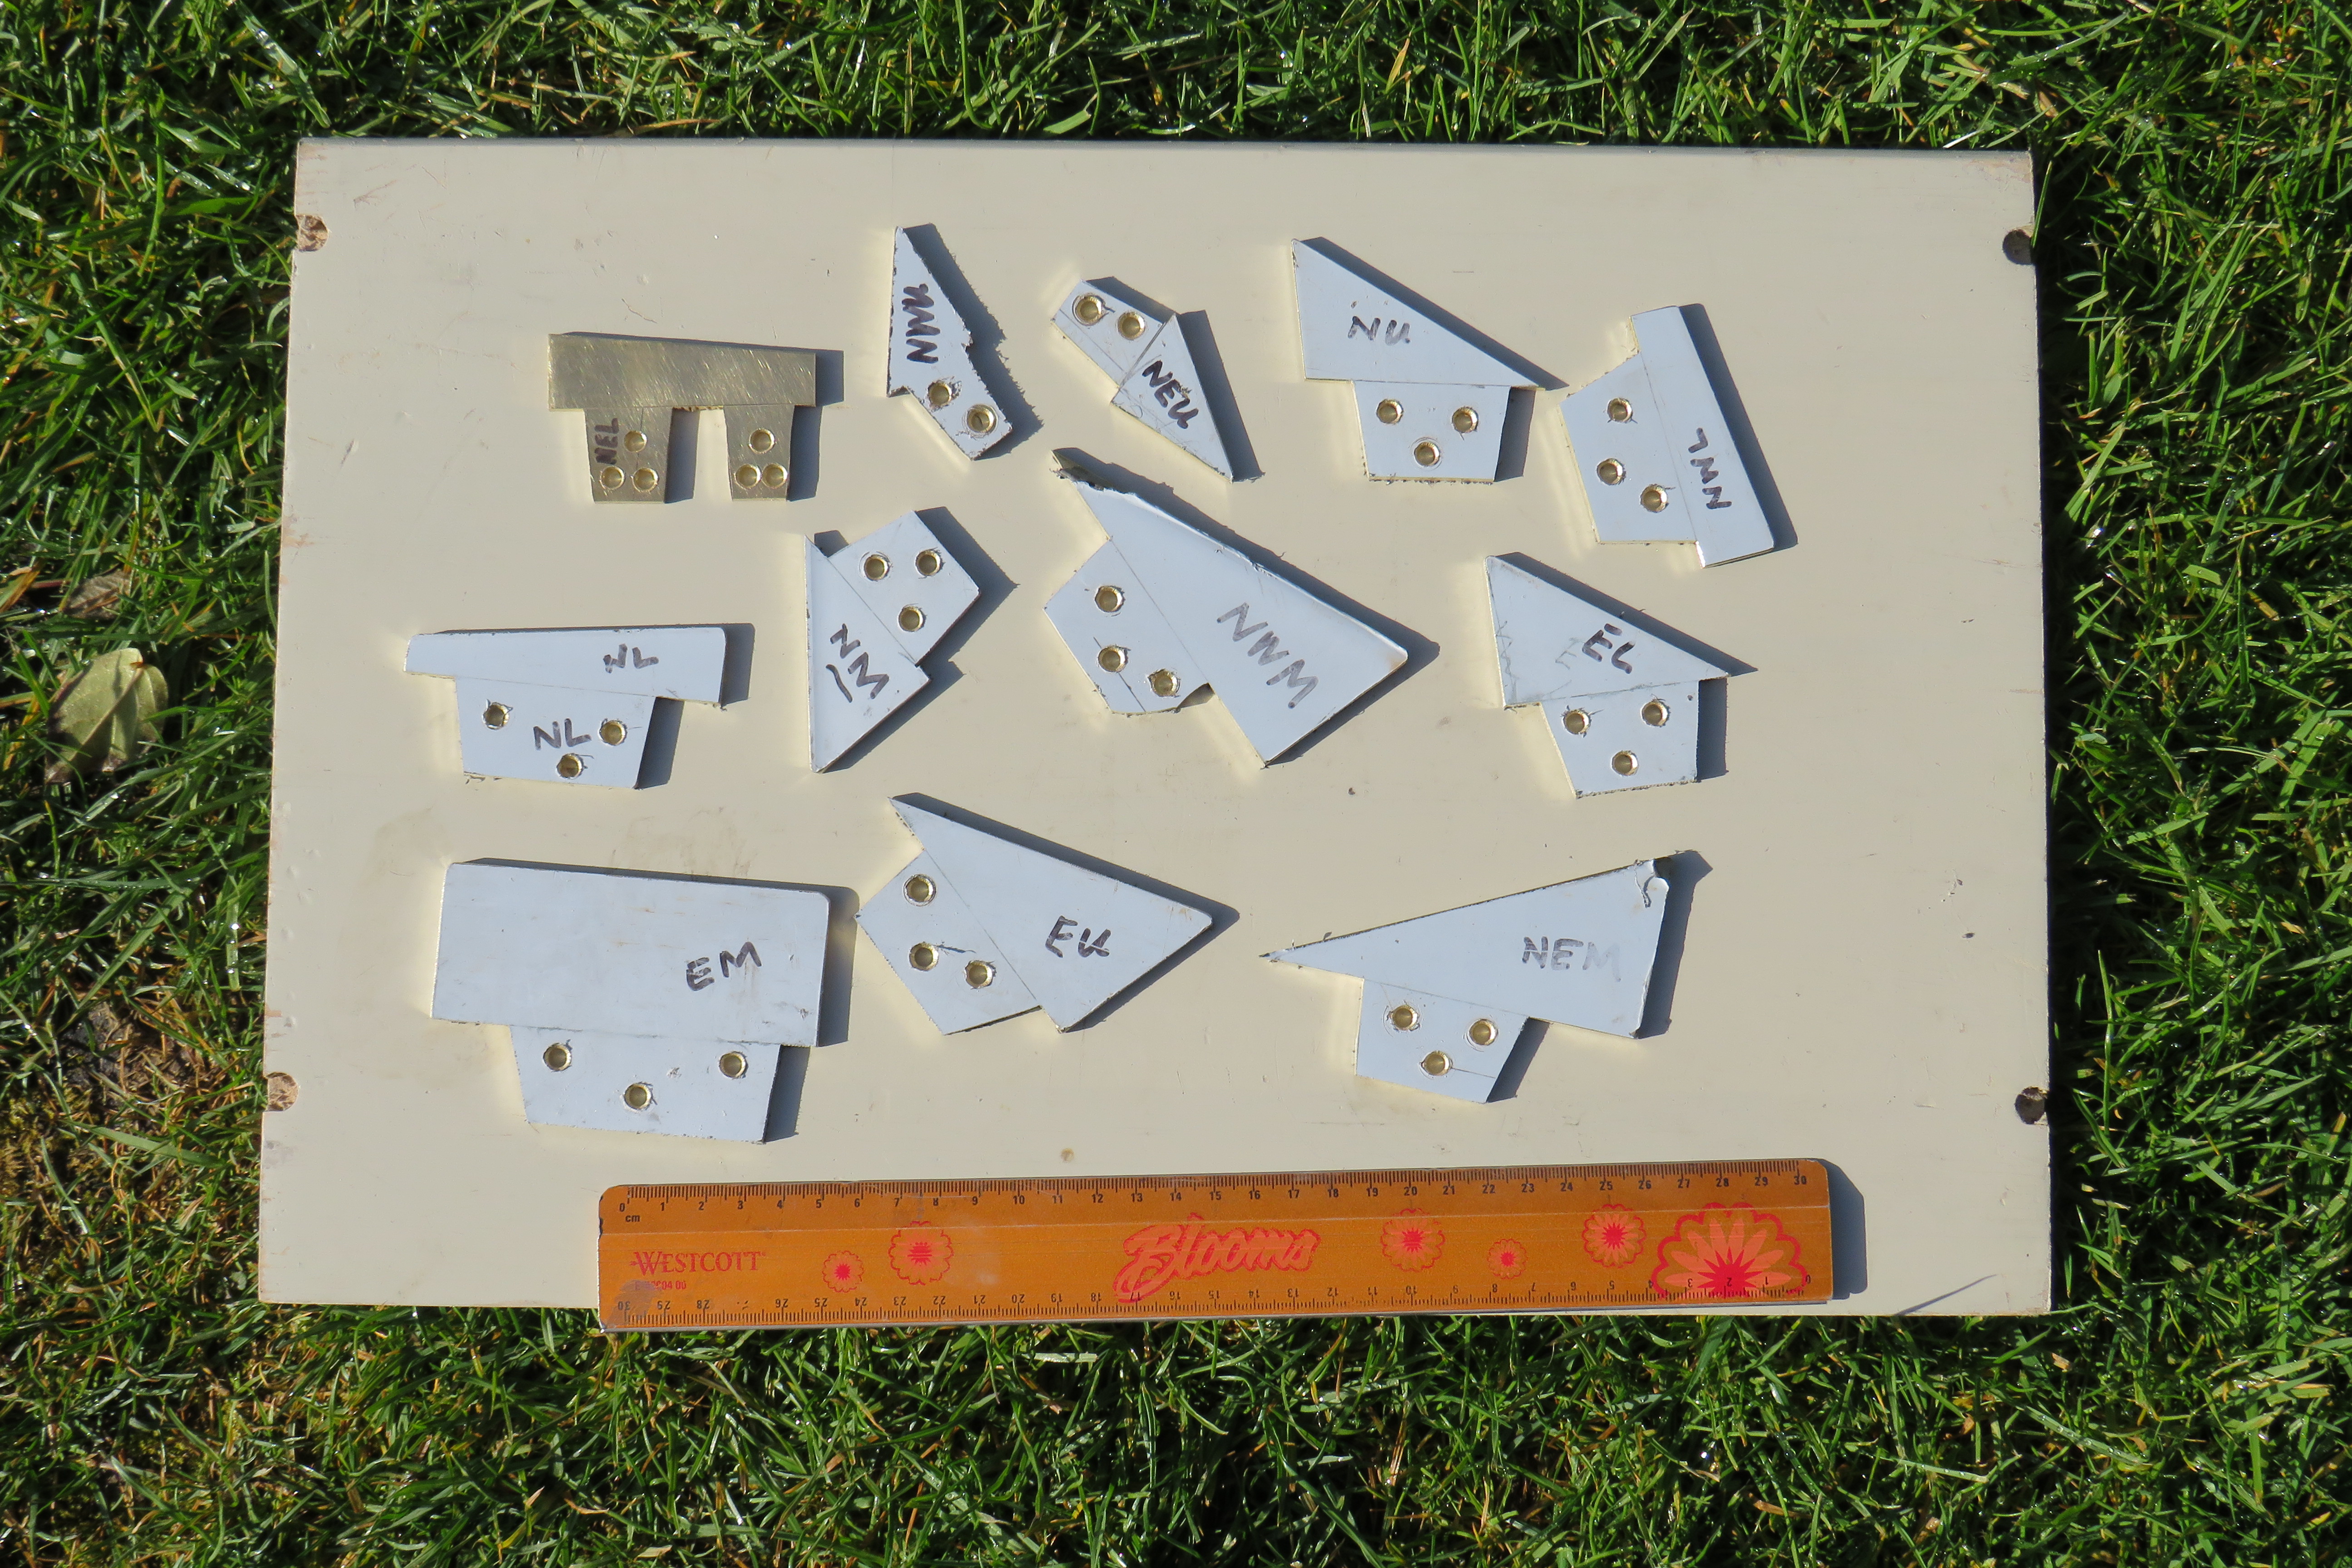
Refinement of the detailed design of all the 25 dials was carried out iUsing Shadows Pro created by François Blateyron during the winter months and full-scale drawings were made. I decided that all faces would have a border that separated the numerals from the hour lines. The numerals would be in a plain Arabic style and hour lines would radiate wherever possible from a notional circle of consistent size centred on the root of the gnomon and terminate at the border. There would be no subdivisions of the hours except on very few of the faces where hour lines were well separated, and noon would be marked with a 12. There would be no date curves except on the horizontal face where pristine stone was to be inserted. Anything more than this was felt to be unnecessarily fussy. Ted agreed with this approach and agreed that the prospect of adding date curves such as for family birth dates together with the requisite nodus for several dials would over-complicate the dial. The plain gnomons were also cut out at this time from 3mm brass sheet. As far as possible, they would be positioned over the existing deep gnomon holes, thereby reducing the amount of excavation of stone that would be needed. The existing holes were several centimetres deep. The new gnomon tenons were 25 mm deep with holes drilled through them to provide better anchorage (Fig. 6). Gnomon heights were as far as possible kept to 40 mm for consistency of appearance.
As the Spring of 2020 advanced, the stone continued to dry out and was kept covered when rain was forecast. I was glad of the opportunity to concentrate on cutting the dial faces when the first Covid-19 lockdown was introduced (Fig. 7).
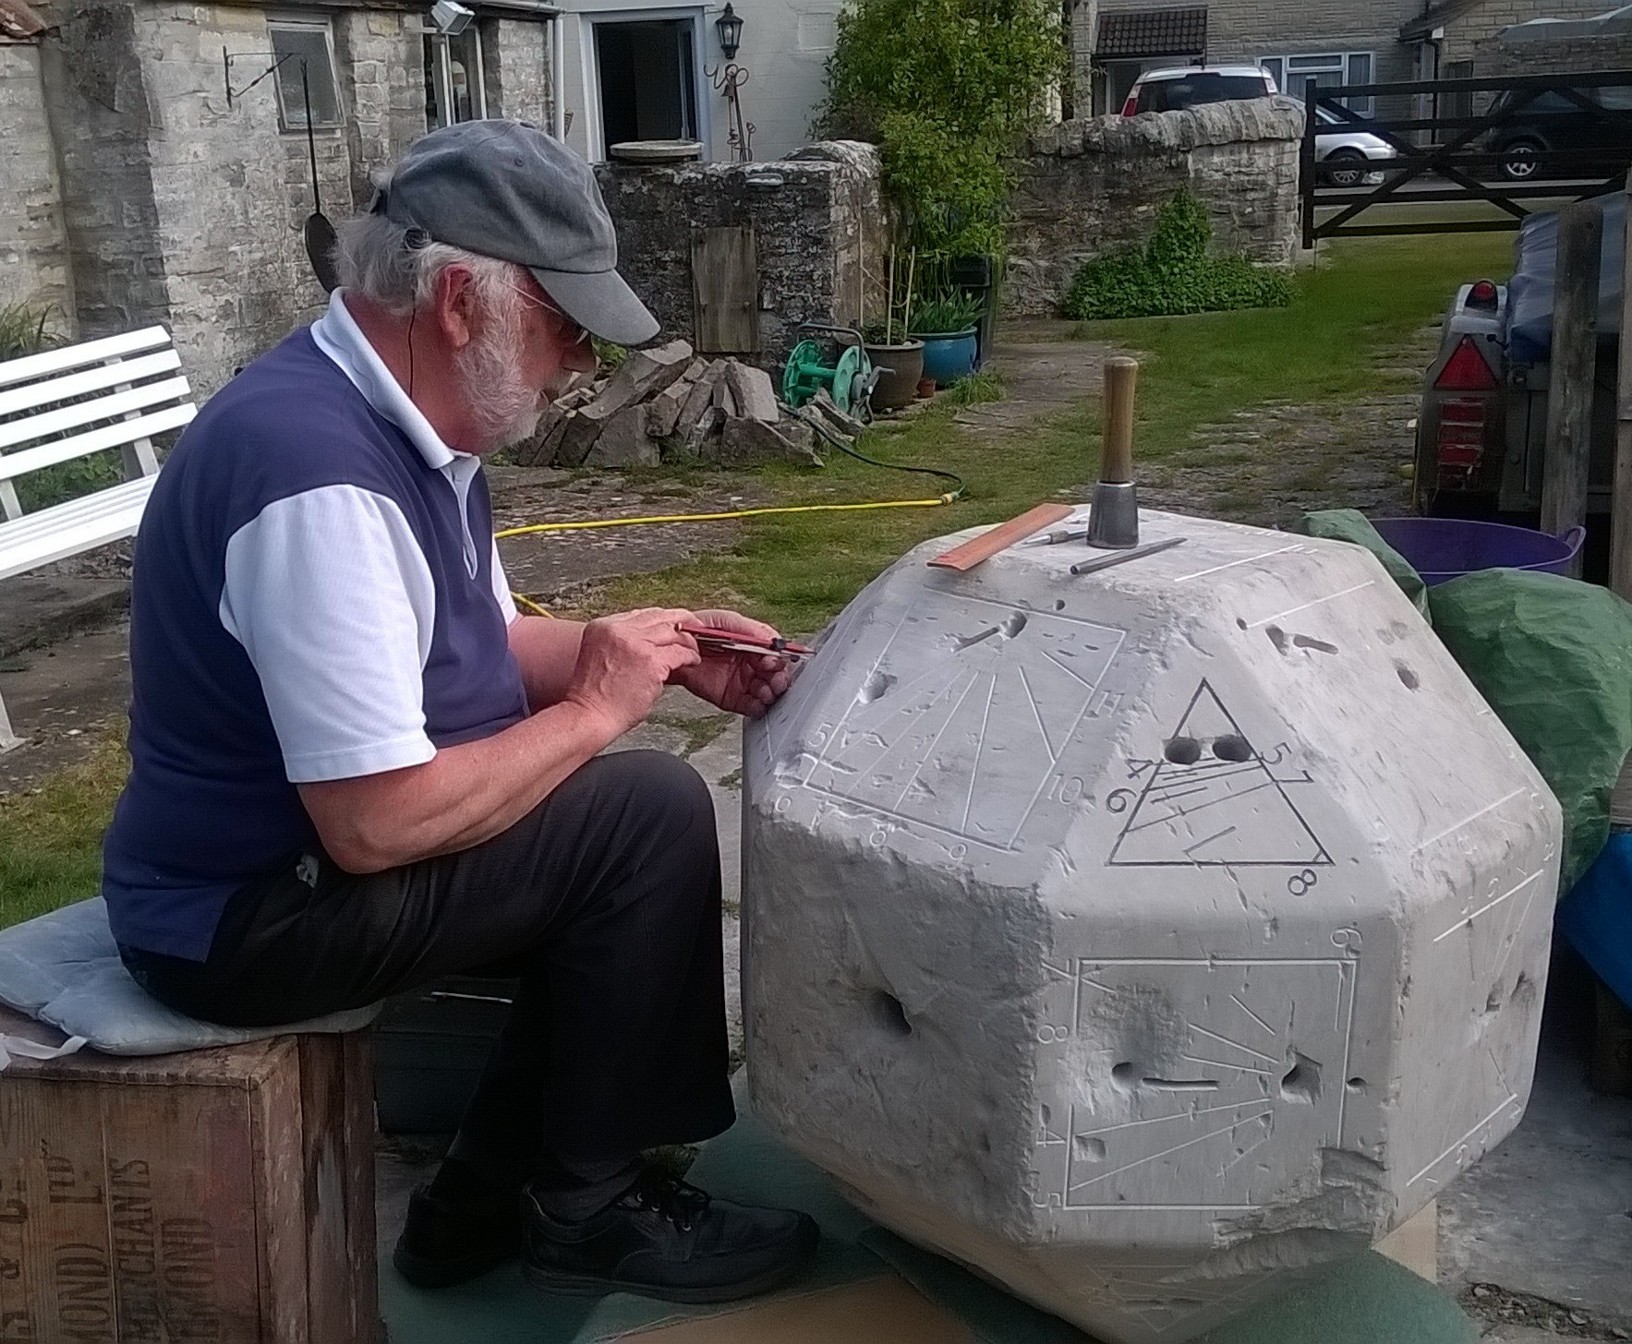
The stone needed to be rotated and rolled on its supporting wooden pallet from time to time to make it easier to work on the faces. This was done with the willing help of two strong grandsons who live nearby. The cutting of the details of each face took about half a day from start to finish. Gnomon thickness was allowed for. The gnomons could not be fixed yet because the stone still needed to be rolled from time to time to gain access to new faces that still had to be delineated. Location marks were made on each face to indicate the eventual positions of the gnomons. This was quite tricky in some cases where the gnomons were to be fitted in regions where stone was missing because of the cavities left long ago from the previous lead fixings.
During this long dial-cutting process I tried out the painting of one of the smallest and least significant faces – the triangular NW lower face. Whether I used matt black enamel or black acrylic made little difference to the extent to which the soft stone soaked up the paint like blotting paper and bled into the surrounding areas. Pre-treatment with a stone seal improved matters somewhat, but I was not pleased with the ragged appearance of the incisions when the dried-off surface was rubbed down. I conveyed my misgivings to Ted, and he agreed that the only face that should be painted would be the horizontal one which was to have a new piece of stone grafted into it. The paint on the NW lower face was therefore removed.
The fixing of the gnomons was the next major task. I usually use an epoxy adhesive and stone-dust mix which sets in about 30 minutes. A little tinting paint can be added to create a colour-match between the adhesive and the surrounding stone in the small space between the gnomon and the stone. For a single gnomon in a slate sundial the volume of adhesive would be about 10 ml. Judging by the size of some of the cavities in the polyhedron, I would need many times this volume for each of the 25 dials. A more straightforward solution came from a builder friend who recommended that I try a very strong quick-setting adhesive applied from a long-nosed mastic gun iAnchorset Red 300 made by Ever Build. It sets in about five minutes. Each gnomon in turn was supported in place with wooden blocks as the adhesive was squeezed around its tenon. The adhesive colour was dark grey, so it was not allowed to come near to the surface of the stone. The bottom part of all the deep holes was also filled to within about 5 to 10 mm of the stone surface.
Meanwhile, a solution had to be found as to how to complete the filling of the unwanted cavities in such a way that as far as possible they would be no longer visible. After some research, I came across a helpful firm in Middlesborough iStone Tech (Cleveland) Ltd., Lee Rd., Bolckow Ind.Estate, Middlesborough, TS6 7AR. In return for a sample of the original stone extracted from the horizontal face they sent to me, at small cost, a 10 kg tub of dry stone and hydraulic lime components that would match the sundial in colour and texture. In the event, the resulting mortar matched well in colour, but was much rougher than I wanted for the surface finish. Following the comprehensive instructions they had included, I nevertheless used the mortar to bring the level of the cavities to within about 2 mm of the stone surface. I had collected the stone dust from all my earlier cleaning, shaping and drilling of the stone, so I used some of it to experiment with a finishing mortar by combining the stone dust with lime in the proportion of 3:1 (stone dust:lime). This mortar set firmly and without cracking due to shrinkage provided that the thickness was not more than a few millimetres and that the mortar was prevented from drying too quickly by frequently spraying it with water for at least a day. The result was a good match to the sundial stone in texture but was slightly lighter in colour. My concerns about this slight miss-match were allayed a few weeks later when I delivered the completed job back to Ted, who said that the visibility of the repairs added to an understanding of the history of the sundial as a whole.
The only remaining job was to graft in a new piece of sandstone for the horizontal dial. It was this face that had suffered most from the accumulation of water in the holes left by the lead gnomon fixings which had disappeared long ago. This surface would also be the one that would be most likely to have standing water on it, so a newly-inserted piece of stone would have to be well-fitted. All the dials had a frame separating numerals and hour lines which meant that the stone to be inserted could have its edges corresponding to that frame. A square recess was cut in the horizontal face a little over 23 cm square 2 cm deep. The 23 cm square of new stone was set into this and bonded with epoxy stone adhesive mixed with stone dust. The edges of the insert and the recess itself were slightly chamfered so that when the adhesive had set there would be a defined border between the grafted stone and the surrounding stone. This border would later be painted black along with all the other details on this face including the numerals. The apex of the triangular gnomon was arranged to be at such a height as to enable it to act as a nodus for three seasonal date curves labelled SS, EQ and WS. The new stone surface and the surrounding surface of the original stone were treated with a stabilising solution iStabilising solution made by Sandtex before the painting in order to minimise the bleeding of the paint into the dry porous stone (Fig. 8). Paint was not applied to dials on the other faces – they could be read easily in sunlight.
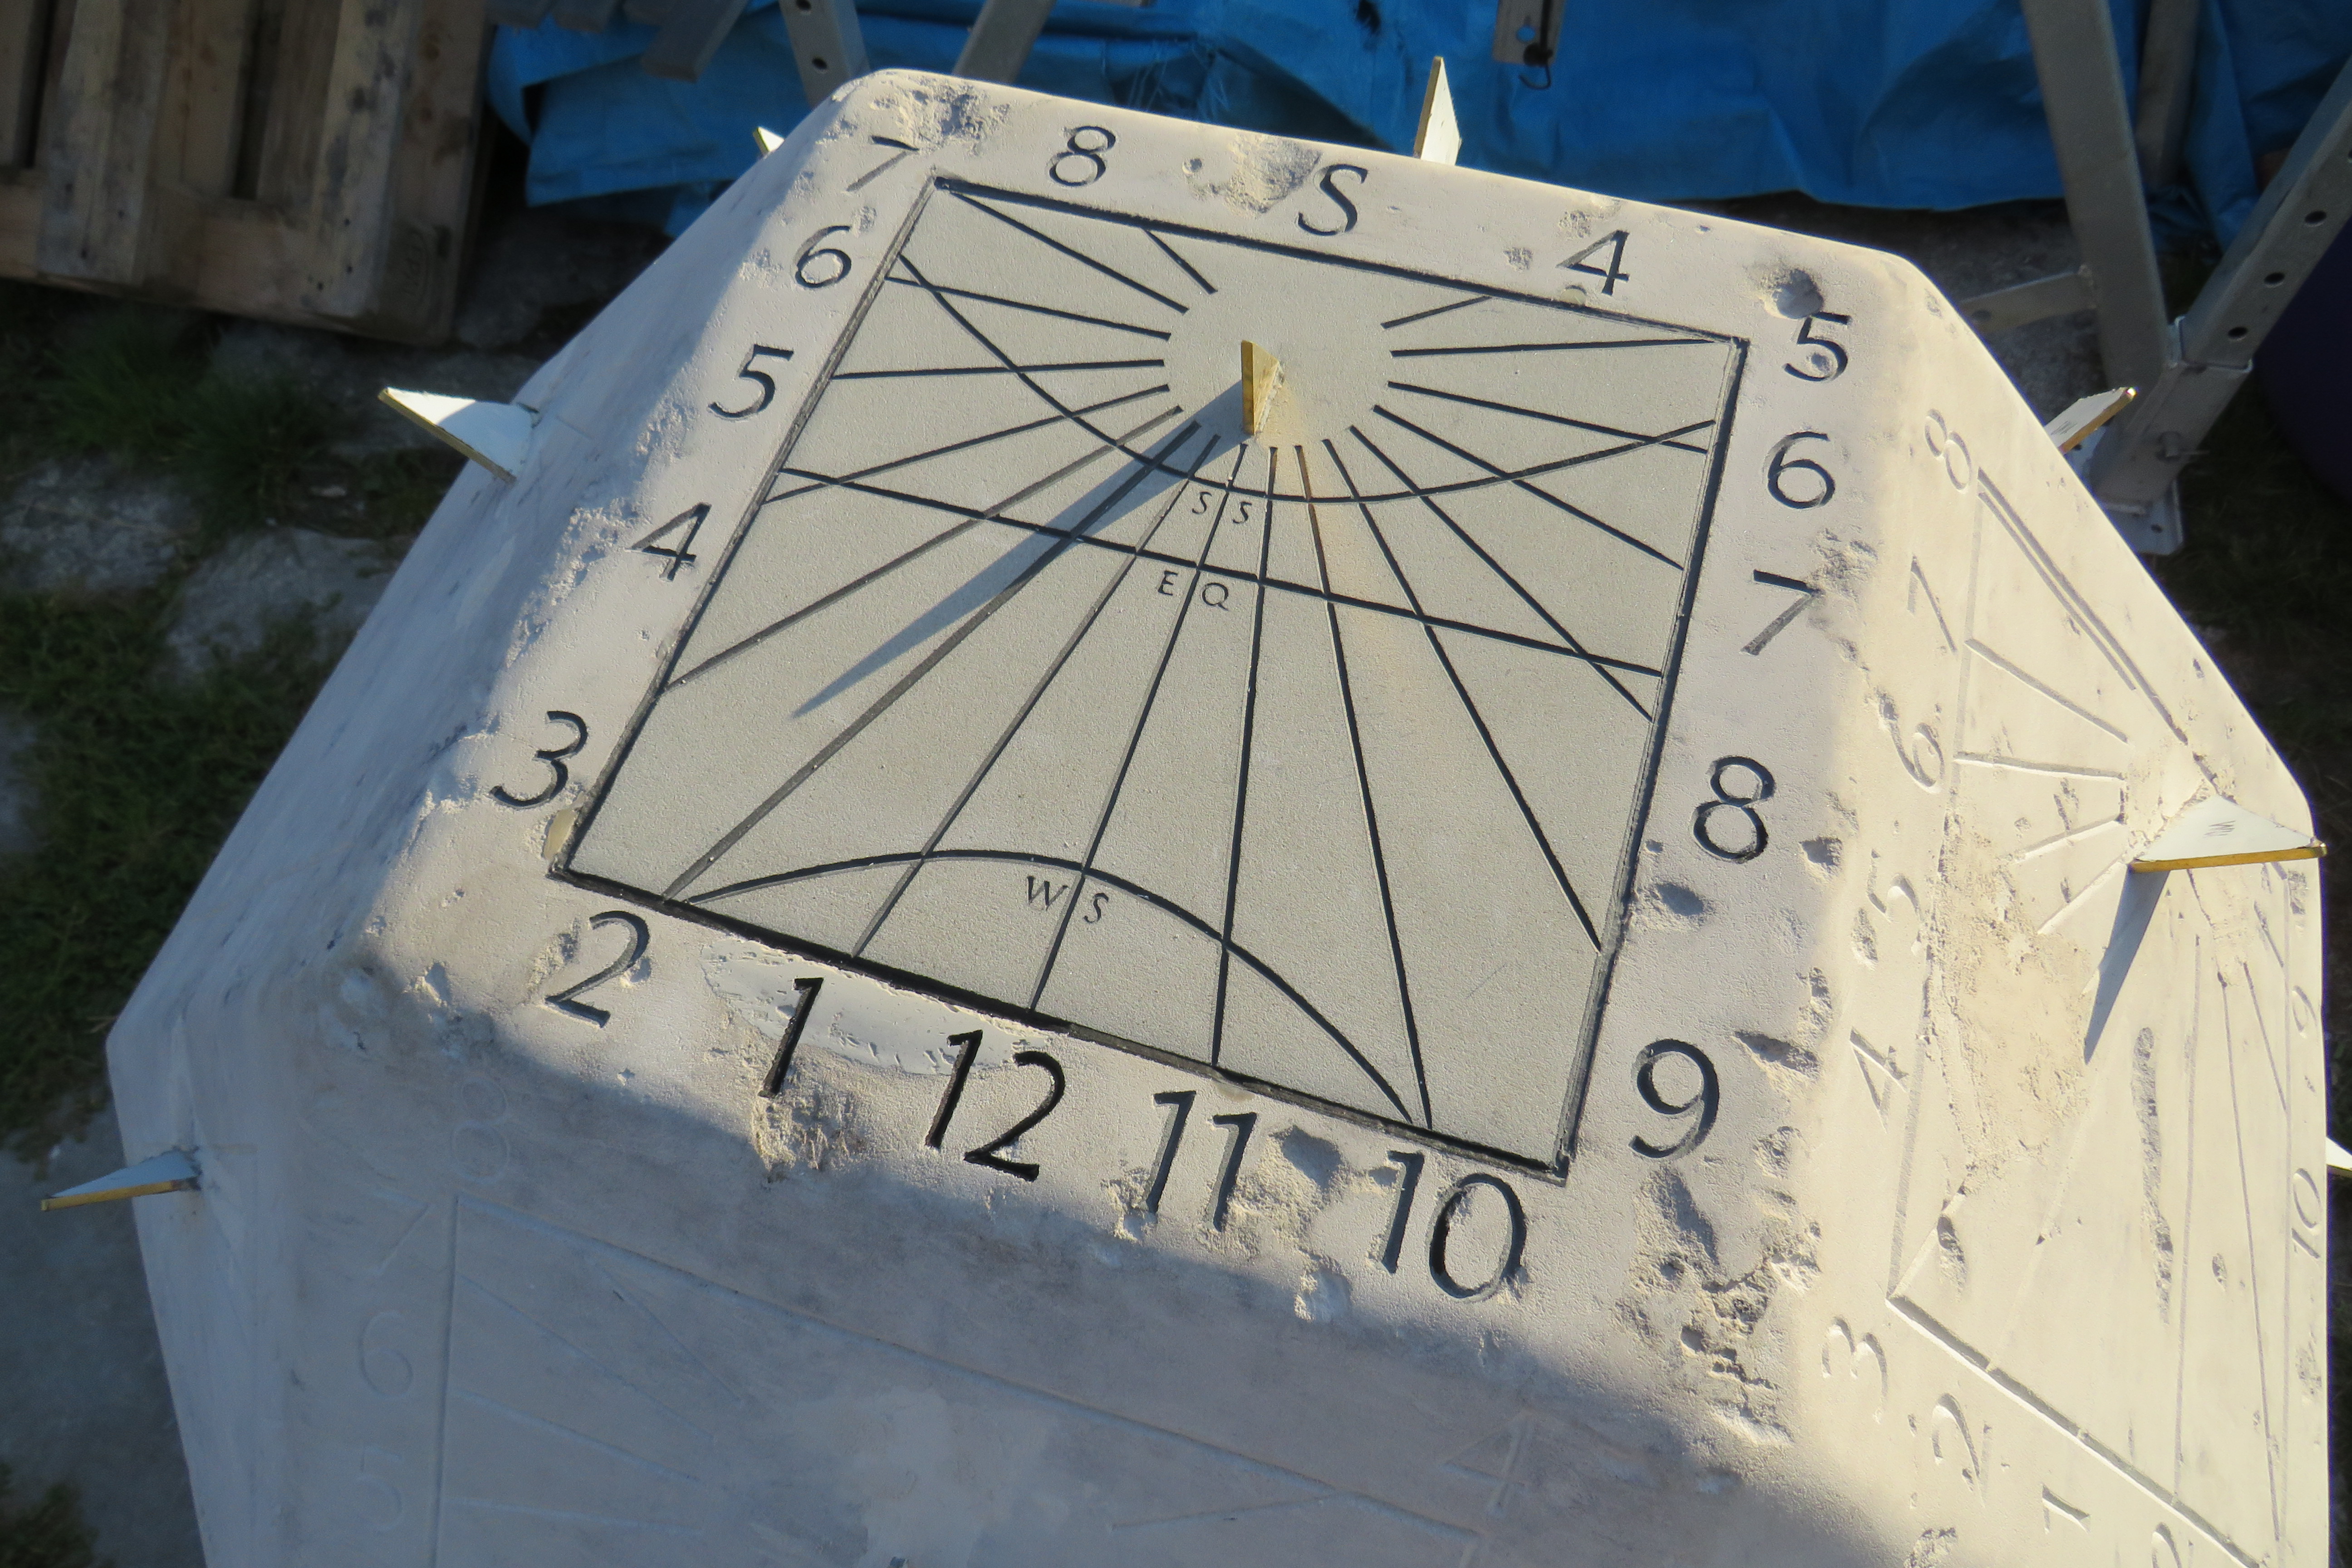
Finally, with stone throughout being thoroughly dry, and the need to protect it as much as possible from absorption of rainwater, a stone water-shield coating iThompson’s Water Seal. was applied to all the surfaces. This was perhaps a controversial step since there is a strong opinion that the stone should be allowed to ‘breathe’. I felt that the protection of the stone from water absorption and the consequent discoloration of the growth of algae was more important.
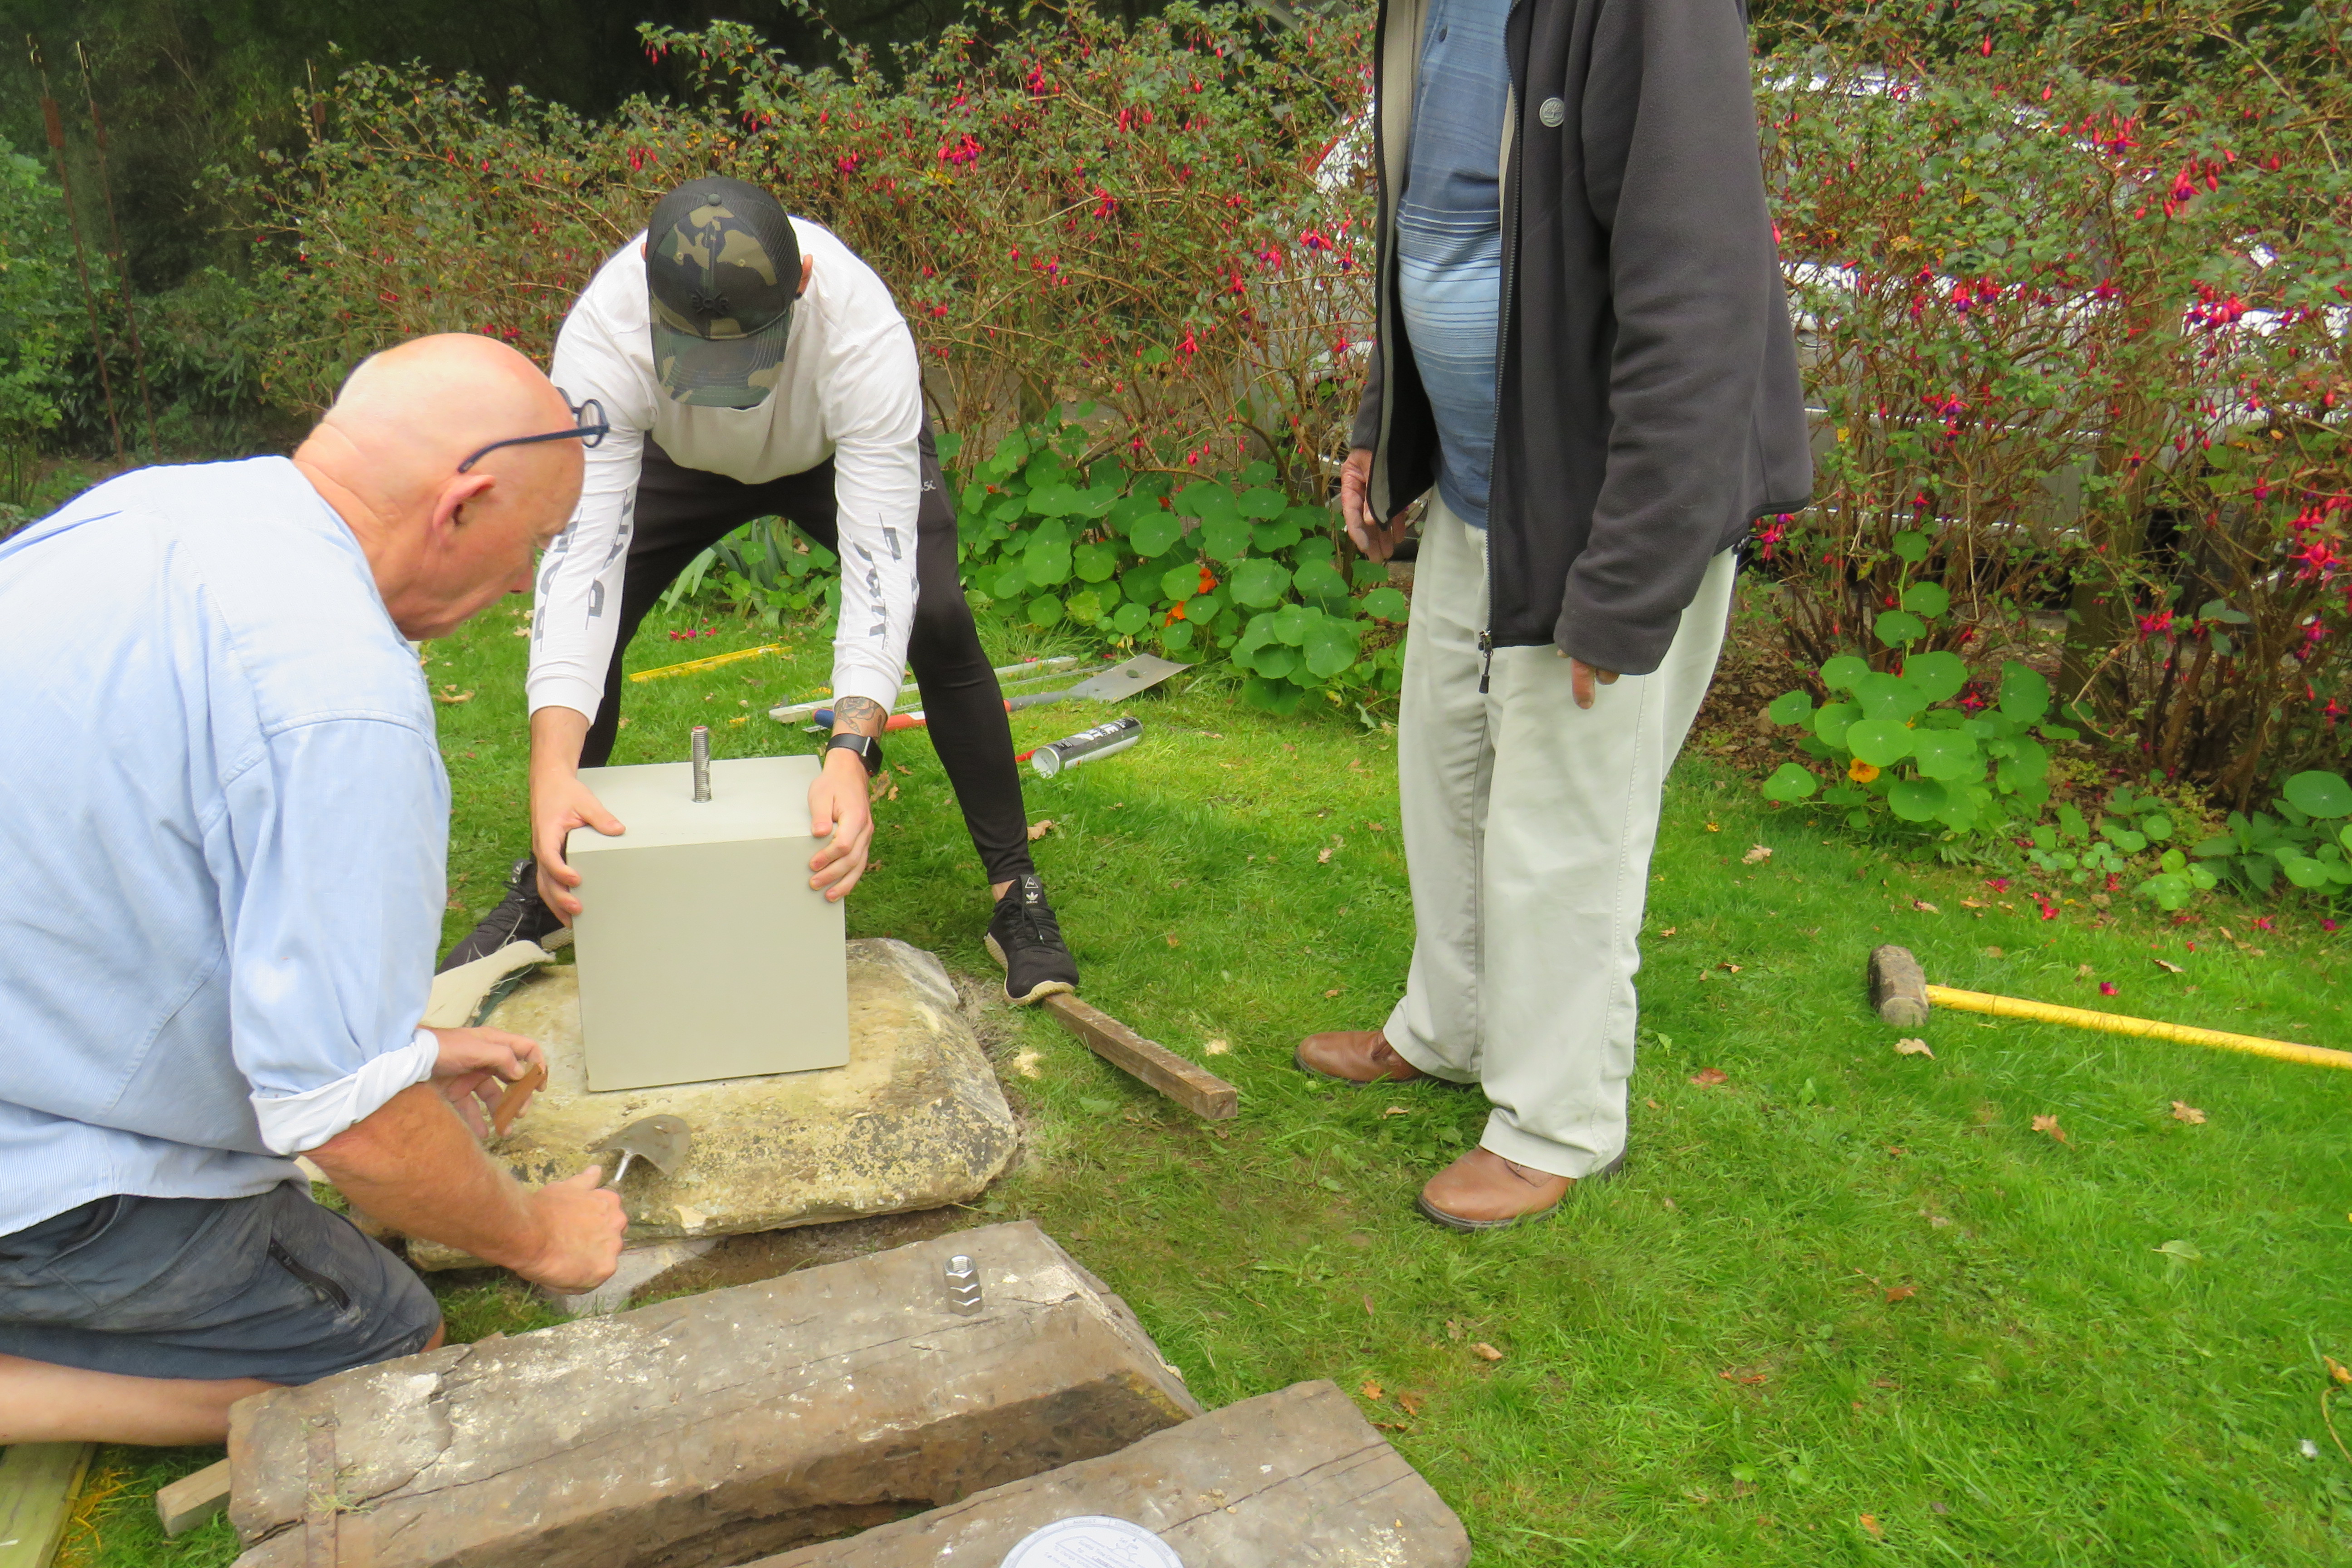
The new cubical plinth still had to be prepared. When the sundial was first viewed in Gloucester, it had simply stood on a square stone slab. It was almost impossible to examine the eight lower faces. Ted wanted it lifting up, which is why the cubical plinth was to be added. But whereas the sundial on its stone slab was in little danger of toppling, sitting on a 30cm cube was a different matter. I drilled a 22 mm diameter hole through the centre of the cube which was wide enough to allow an 18 mm diameter length of stainless steel studding to pass easily through it. The studding was cut long enough to go almost all the way through the stone base slab and to penetrate the already-existing 12 cm deep hole in the bottom of the sundial. This would give some lateral stability to the whole structure. There was one small snag in this scheme – the hole on the bottom face of the sundial was 40 mm diameter. The solution I hit on was to screw four spaced-out stainless steel nuts on to the top 12 cm of the studding, thus making a close sliding fit into the base of the sundial.
In the few weeks before the return of the sundial, Ted used local noon data that I had sent him to establish the direction of the local meridian. With a support from a tall tripod, he used the shadow of a long plumbline falling close to the required site and laid the edge of a long plank along it at the critical moment. When he was content that he had a reliable line from repeated observations taken over several days, he sprayed a paint line on the grass. He was able to level and align the foundation slab accordingly. I helped him install the new cubical plinth a week before the dial was returned. With the stainless steel studding inserted in the slab, the new cubical plinth was lowered into position and aligned to the meridian (Fig. 9). Finally, the four nuts were threaded onto the exposed upper end of the studding and all was set for the re-setting of the sundial which was to be done without my being present.
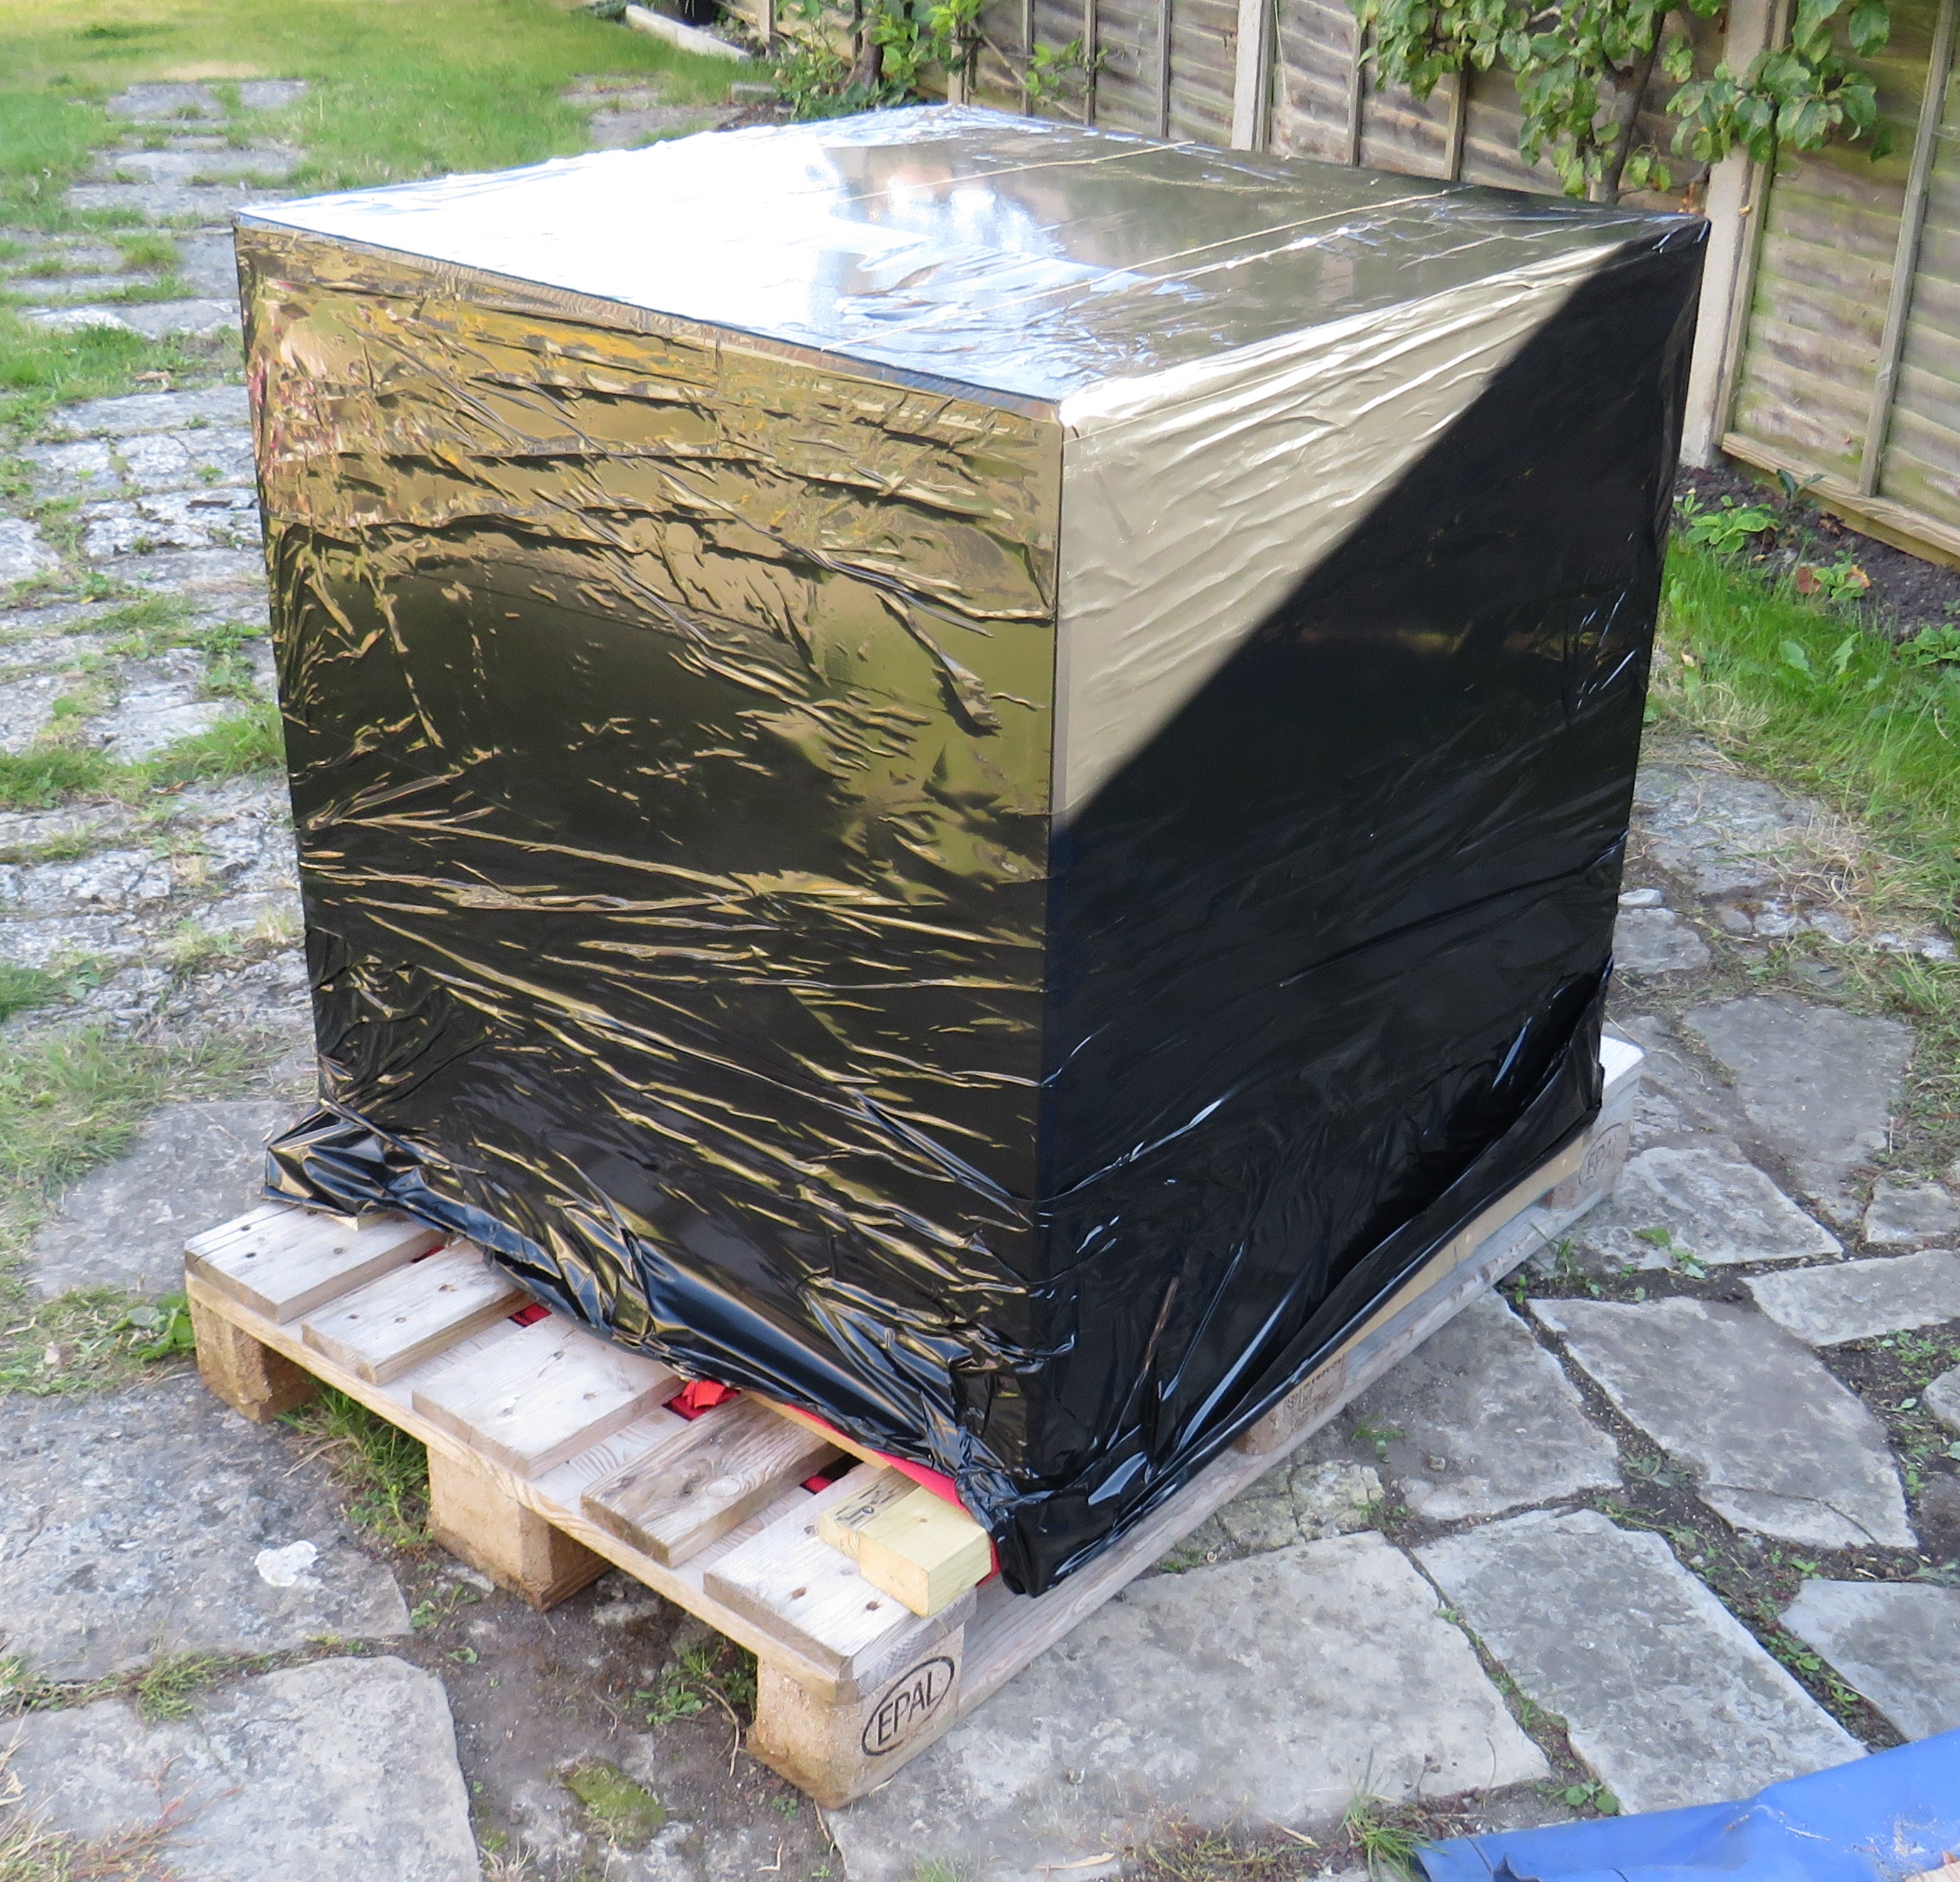
Meanwhile, in my yard, the sundial was moved to an accessible place for easy access by the transport vehicle. Still sitting on its pallet, it was enclosed in mdf sheeting, with cushioning buffers between the dial and the sheeting made from domestic plastic pipe insulation. The whole package was then wrapped in black cling-film. (Fig. 10). There was a tense moment when the crane on the transport vehicle had to hoist the whole package high over the front of the truck (Fig. 11).
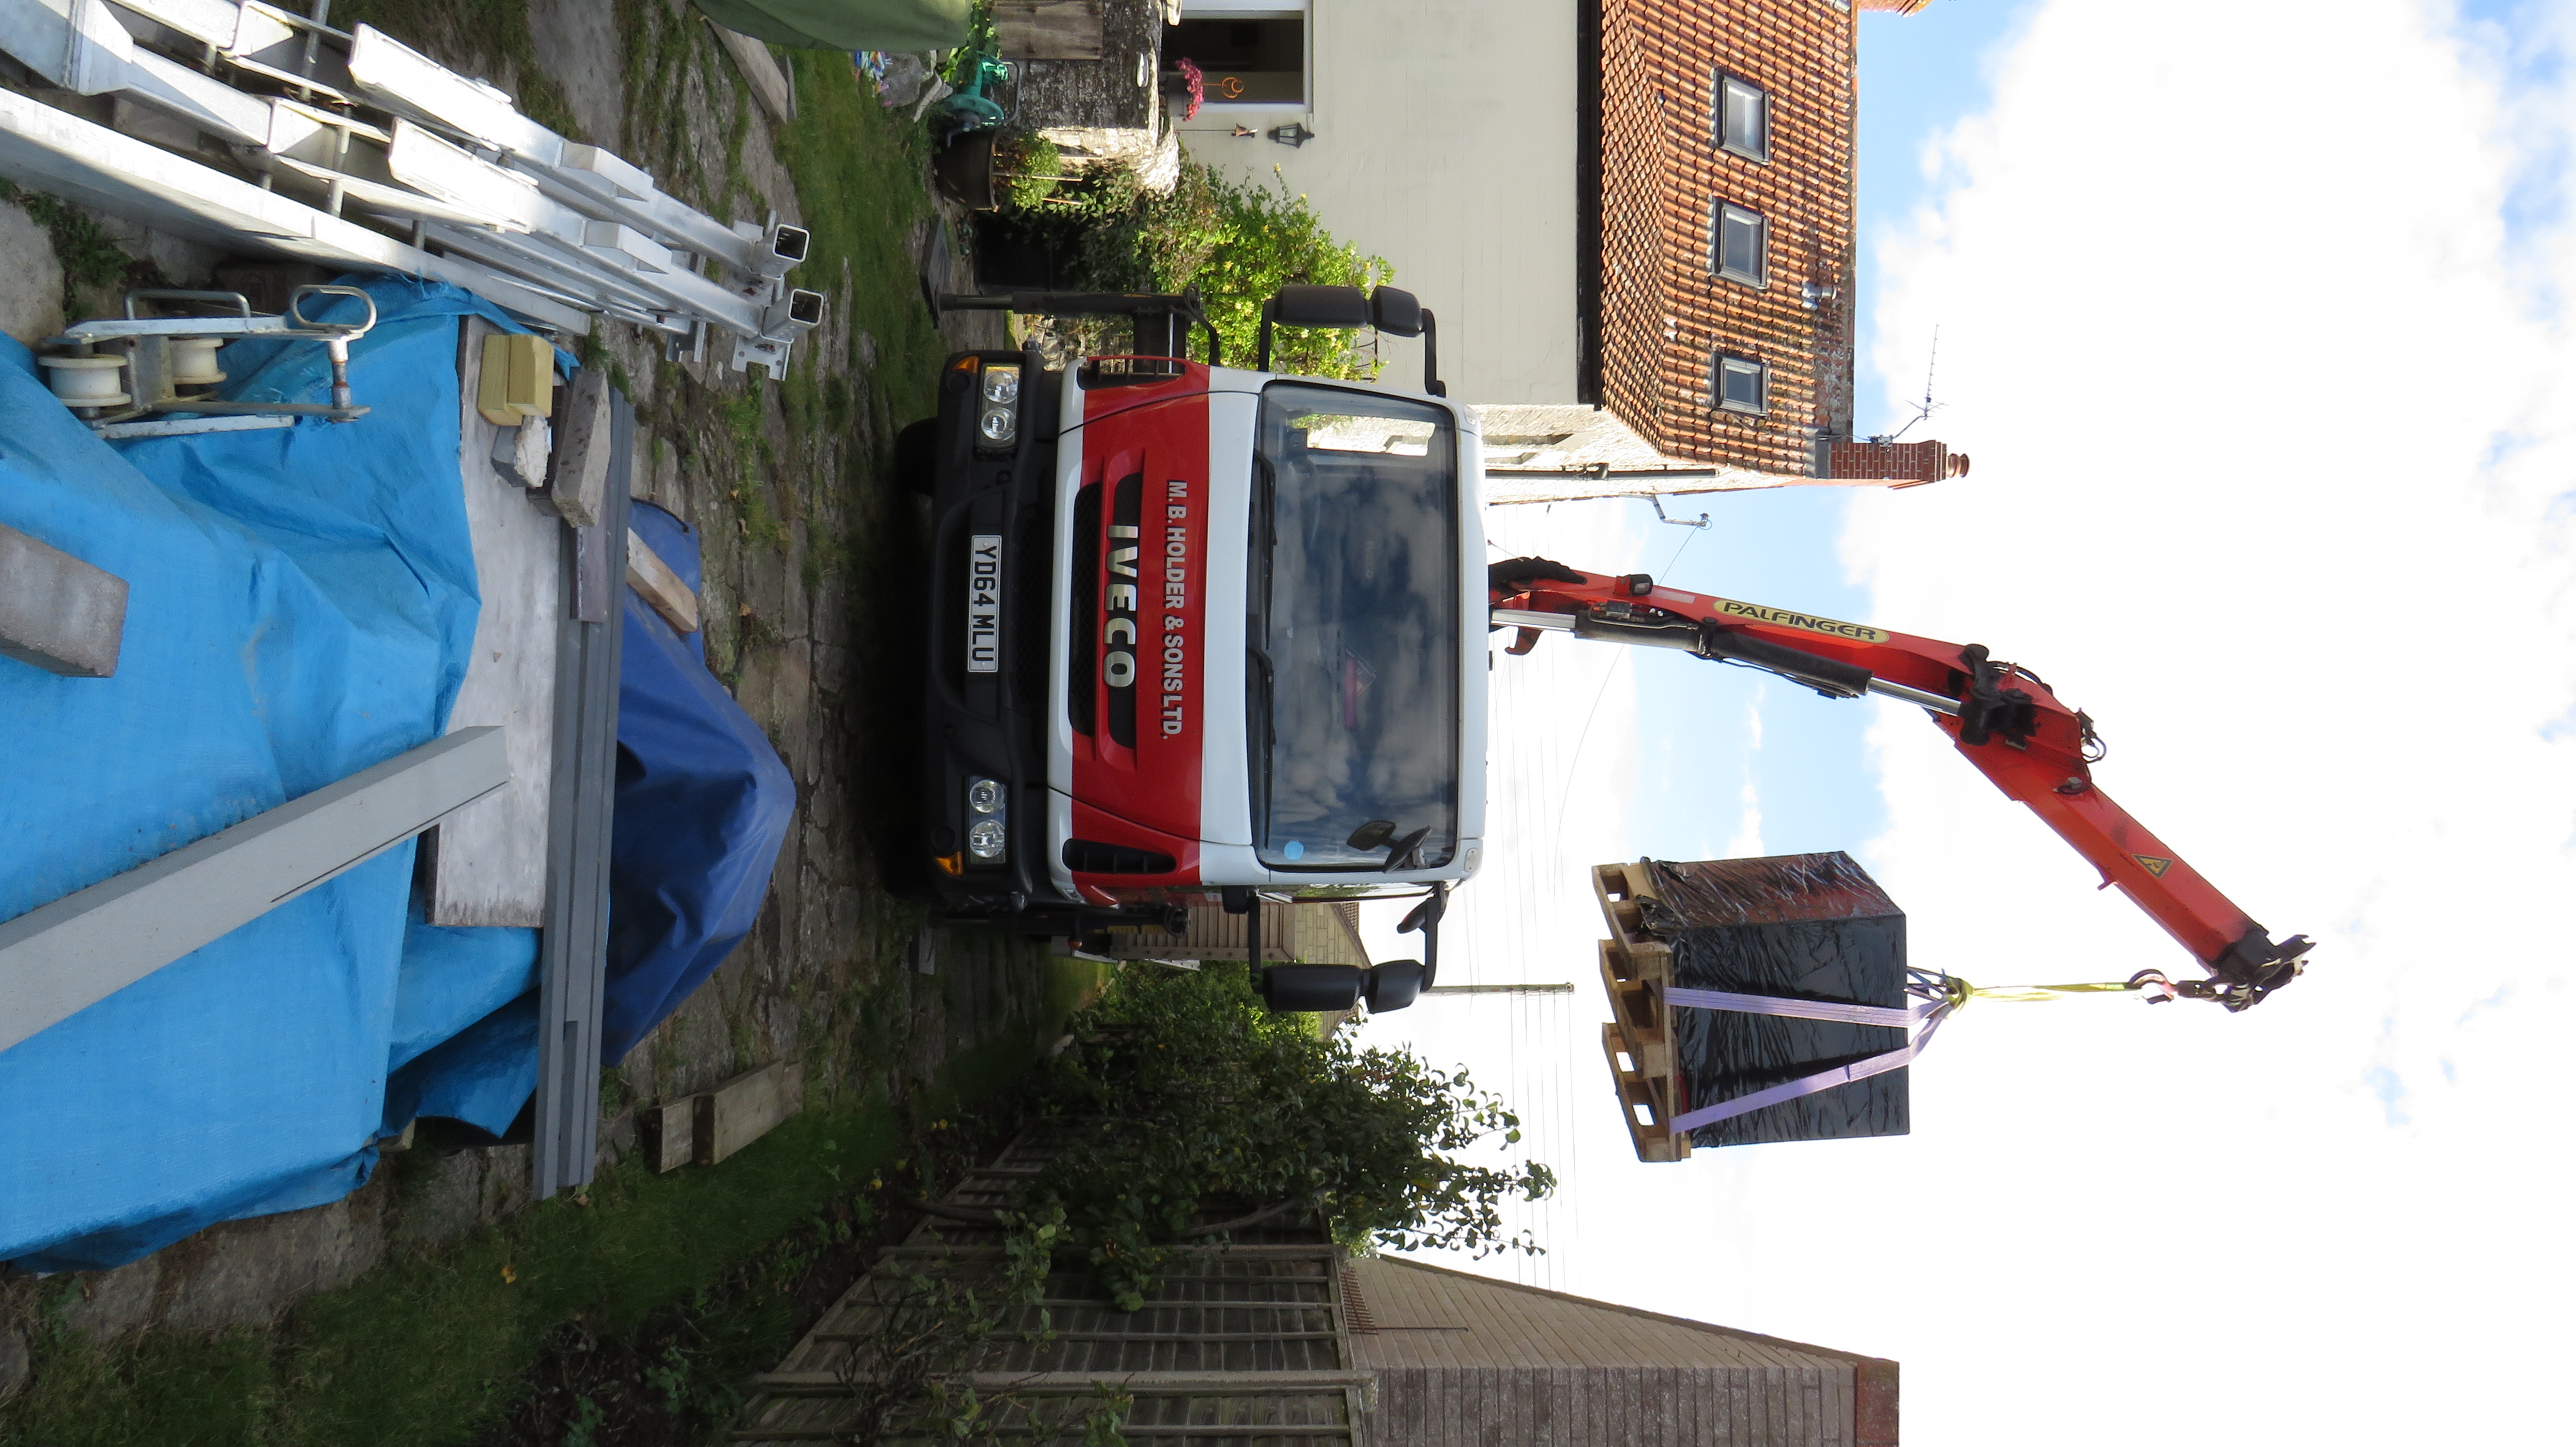
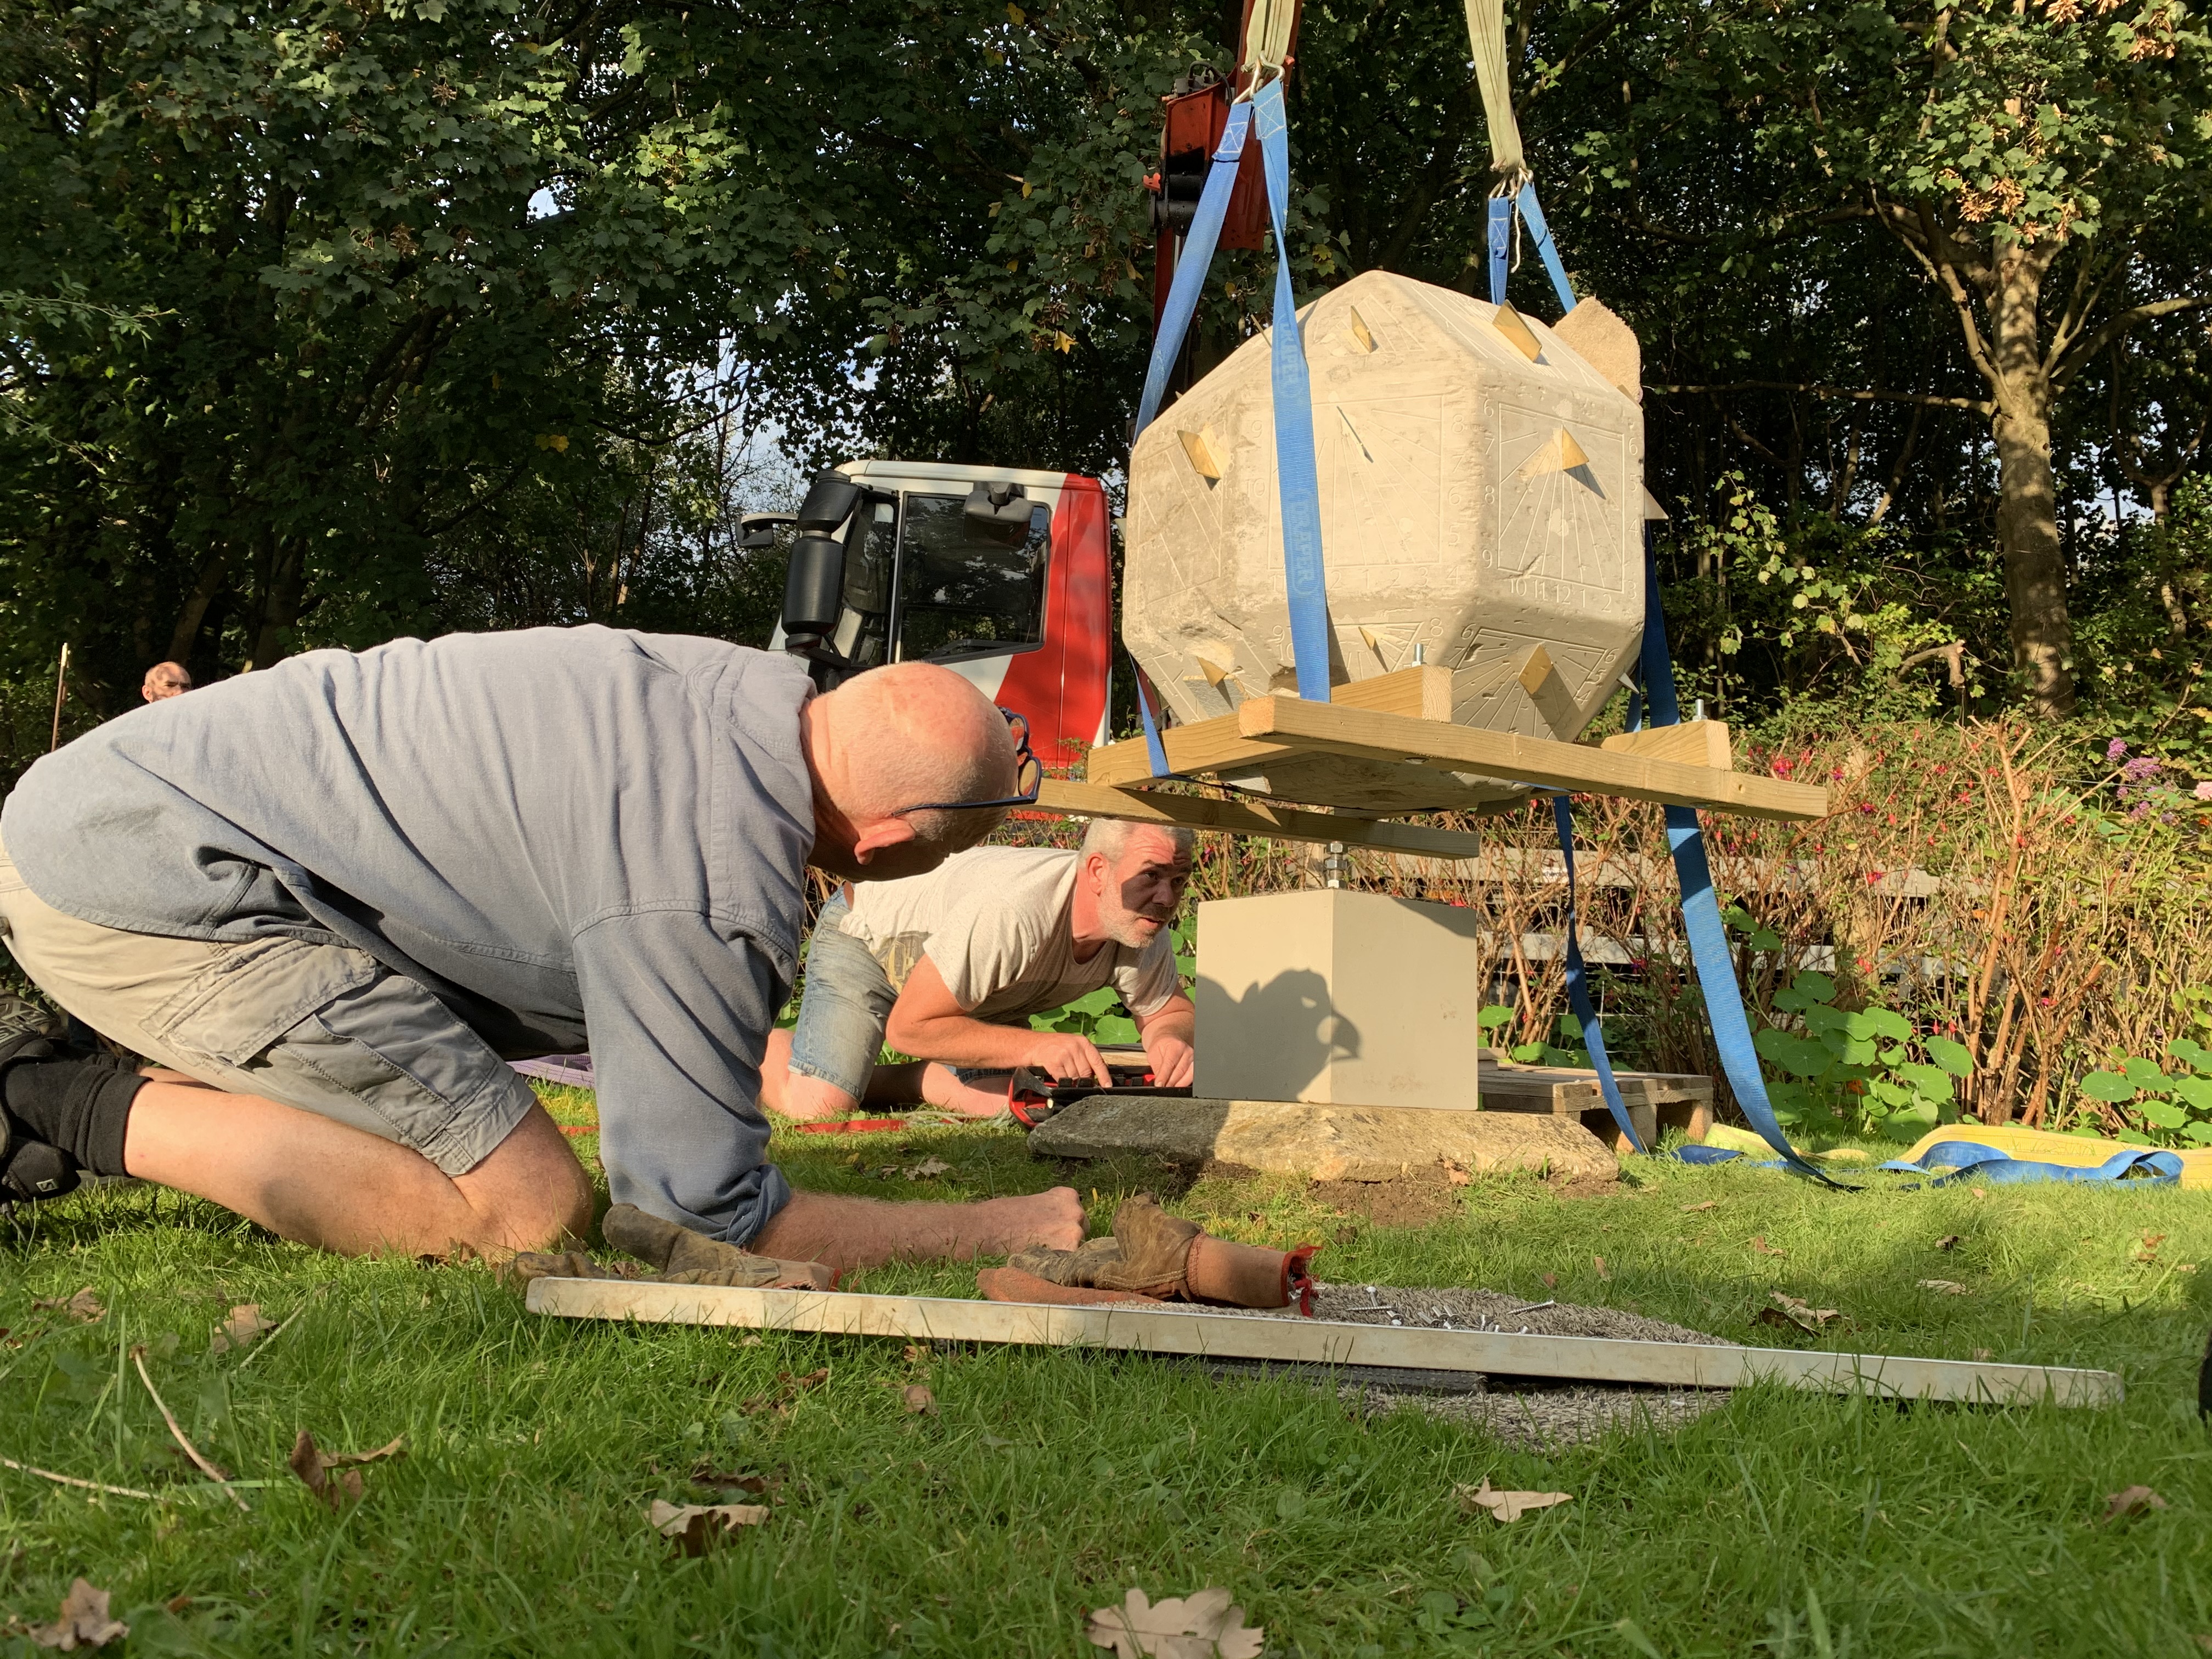
There was considerable relief when it was safely secured on the truck’s flat-bed and transported back to Gloucester. That same day, having skilfully but with some difficulty negotiated the narrow, twisting, slippery path leading to Ted’s property, the dial had to be hoisted over a fence and down a slope close to its eventual resting place. The outer packaging was removed, leaving the dial at last exposed. Hoisted yet again, it was manoeuvred over the waiting cubical plinth and with deft finger-work on the crane’s remote control panel, was carefully lowered on to the stainless steel rod as it was also being aligned to the edges of the cubical plinth (Fig. 12).
The sundial looked good (Fig. 13) when I visited Ted a few days later. He was well pleased with the re-creation of his sundial and plans to hold a celebratory party next year – pandemic permitting.
